I recently got an email from a novice photographer commenting on how they liked that in some of my photos just one flower is in focus – and in others – everything is in focus. And they wanted to know how I got my photos to look like that. Did they need Photoshop or was there another photo editing software package that they could use?
I replied that I set my camera in Aperture Priority, and chose my F-stop based on how I wanted my photo to look – and what part of the photo I wanted to be in sharp focus.
The response I got did surprise me – they replied that it sounded challenging to do it in the field – wouldn’t it really be easier to do it in software?
At least for me, the answer to that question is NO. I would much rather think about what I want my final photo to look like when I’m in the field and do my best to capture it on my camera than to try to fix it in Photoshop later.
When I’m photographing flowers, I tend to set my camera in Aperture Priority Mode. This allows me to choose my F-Stop which lets me control the depth of field – or how much of the photo is in sharp focus.
The lower the number of the F-Stop (such as f 2.8) the wider open the aperture in the lens is – and the smaller the area in sharp focus is. Similarly – the larger the number of the F-Stop (such as F 32), the aperture opening in the lens will be smaller and the area in sharp focus will be much larger.
As just words – that really doesn’t make much sense. It’s one of these things that is much easier to show you than to explain it.
Where the F-Stop numbers came from was back in the day of manual lenses – there were blades that opened and closed to control the amount of light. The aperture or opening was wide open at F 2.8 and closed down at F 32. These photos of one of Bill’s lenses for his large format camera shows the lens blades wide open and closed down.
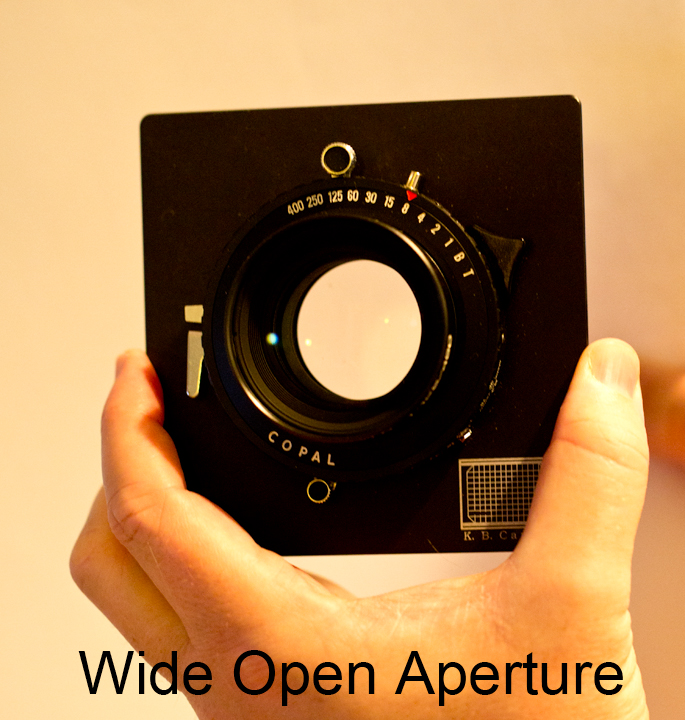
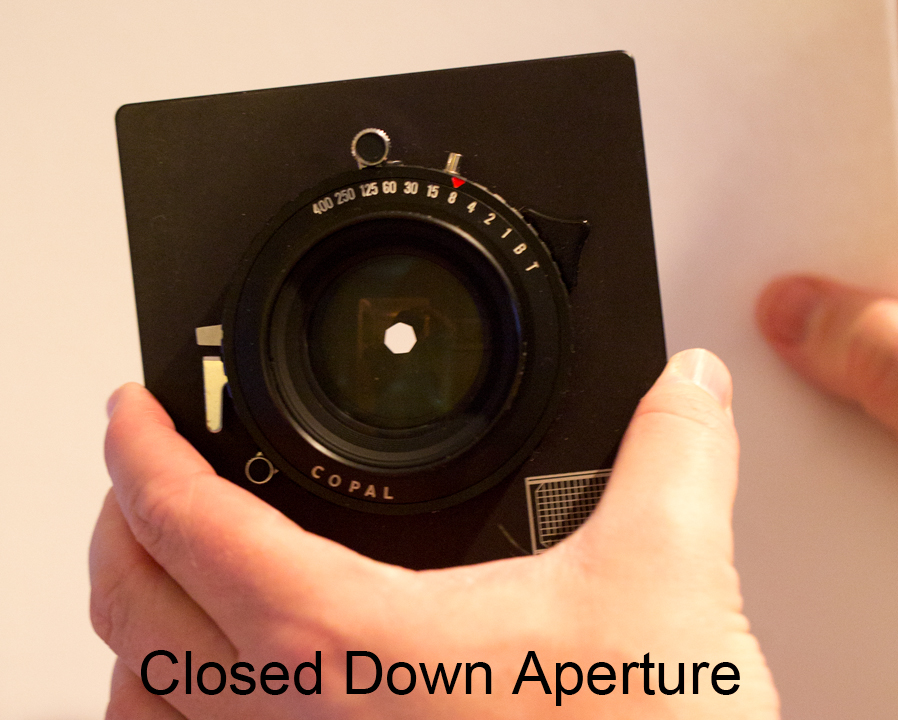
And to show how changing the F-Stop affects the look of your photo – I took a series of 8 photos of butterfly weed at F-Stops ranging from F 2.8 to F 32.
The first photo was taken at F 2.8 – a wide open aperture with a shallow depth of field. As you can see – just a few of the blossoms are in sharp focus and the rest of the photo is blurred.
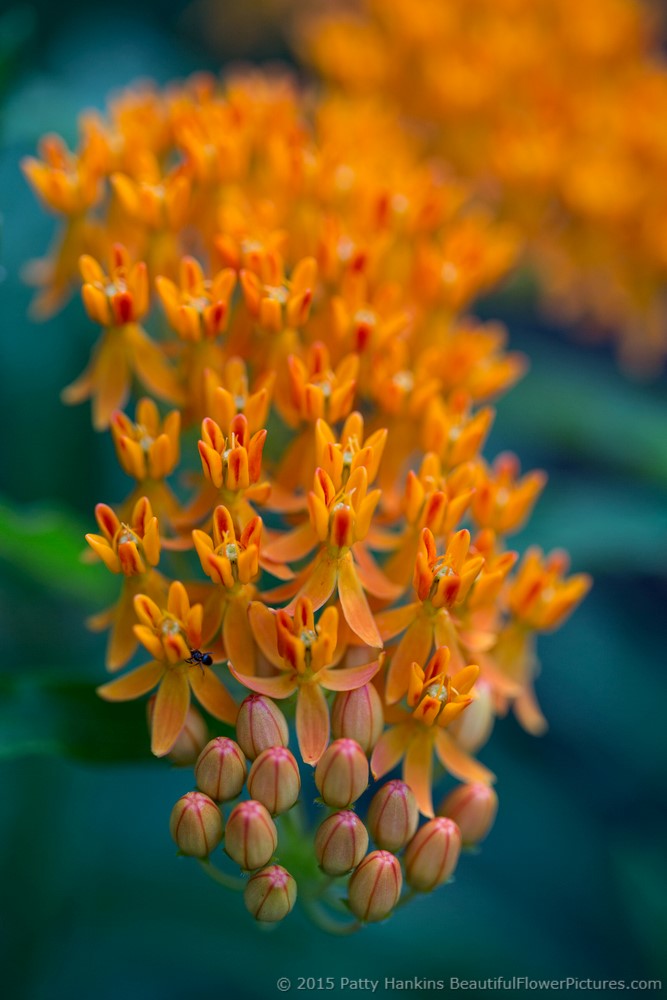
F 2.8
As you look through the next several photos – notice how many of the blossoms are in sharp focus and how much of the background you can clearly see.
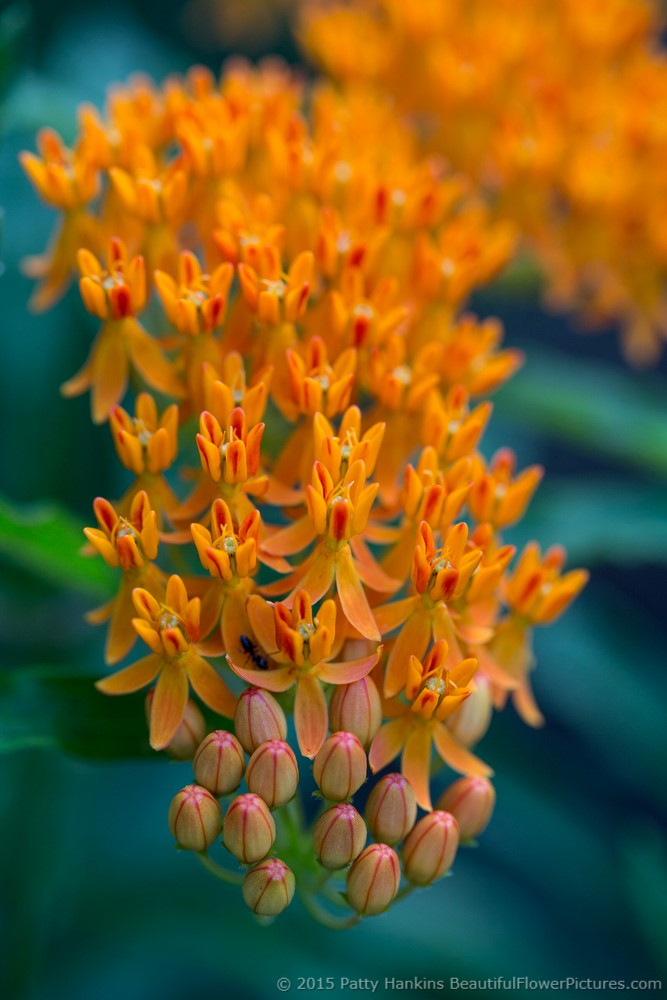
F 4
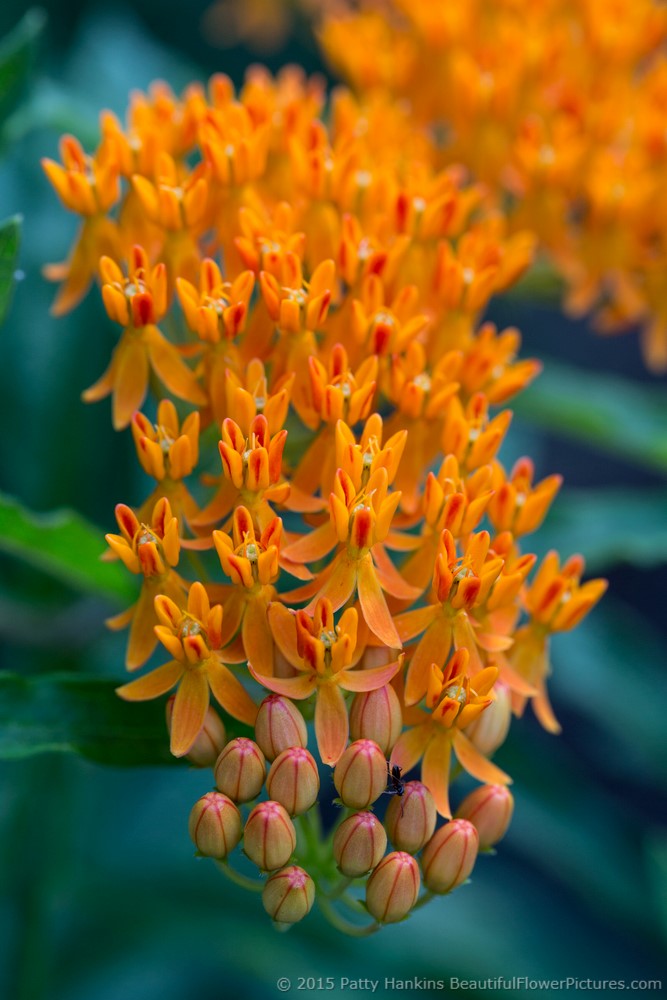
F 5.6
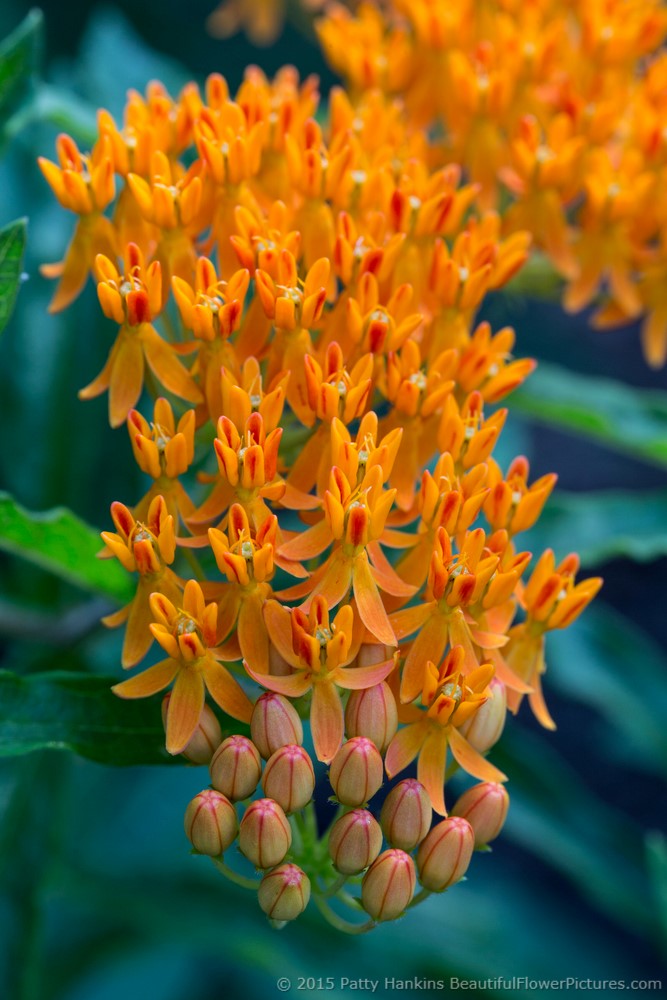
F 8
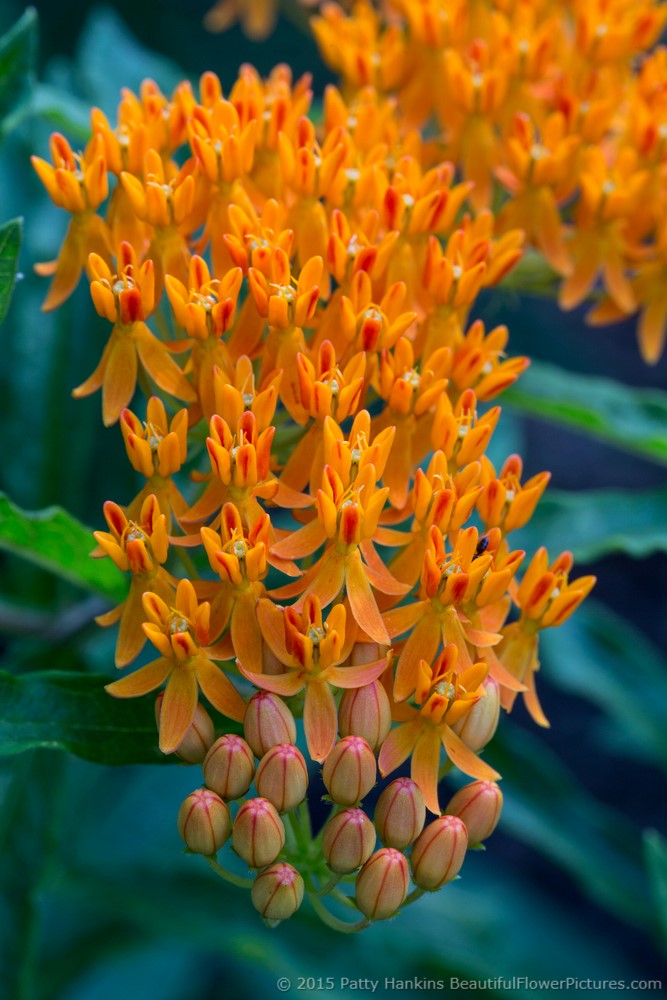
F 11
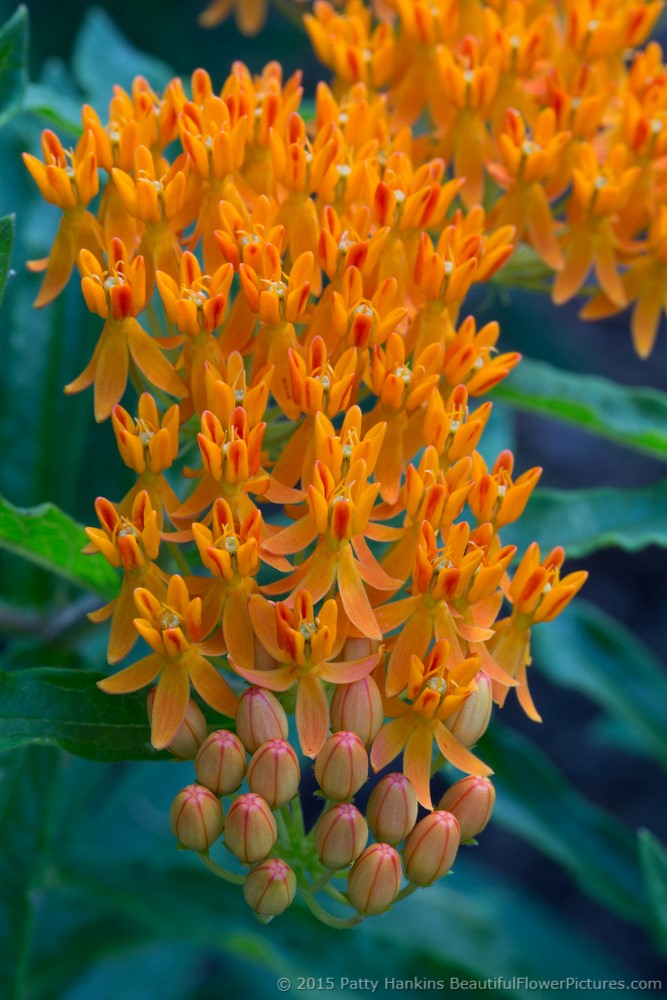
F 16
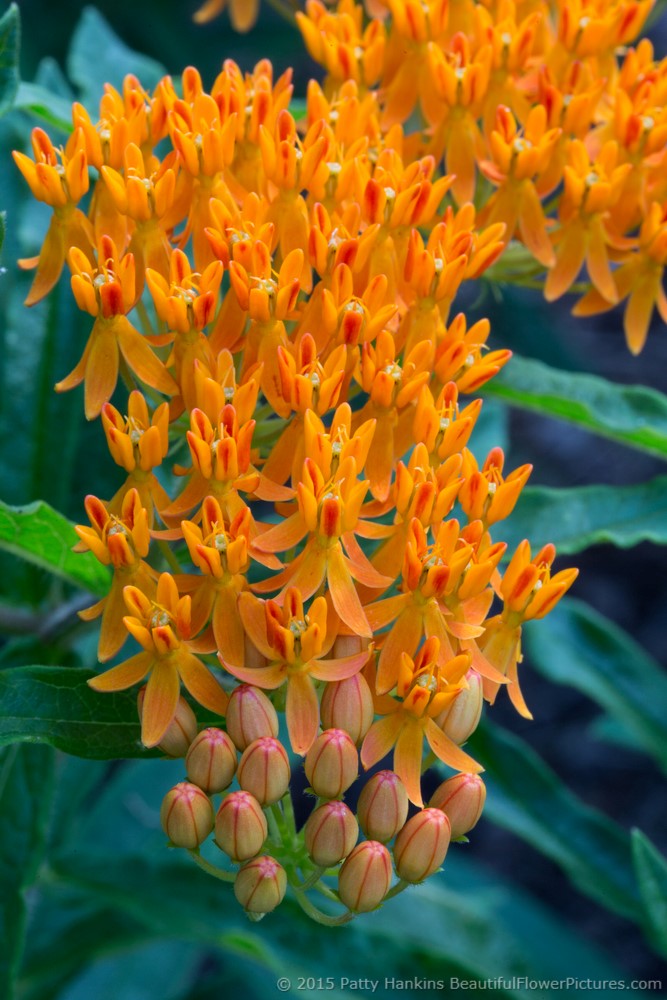
F 22
The last photo was taken at F 32 – a very narrow aperture with a large depth of field. Just about the entire photo is in sharp focus – everything from all the blossoms to the leaves in the background are clearly defined.
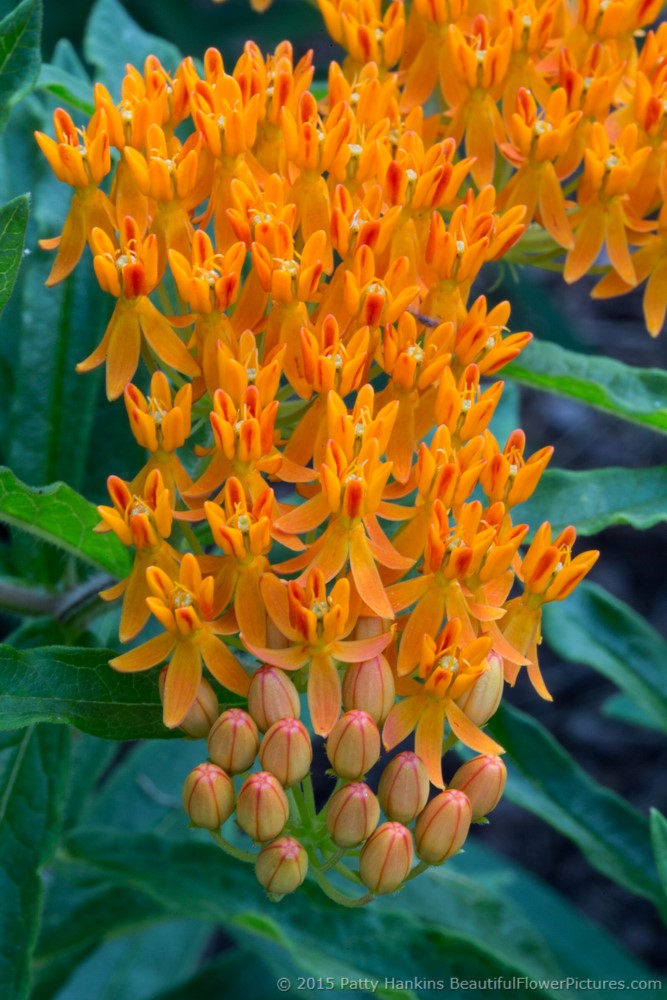
F 32
And what’s great is that you get to decide how much of your photo will be in sharp focus and what your final photo will look like – simply by choosing the F-Stop that lets you create the photo you want to share with the world.
I’d appreciate it if you’d let me know if you found this article helpful and if you’d like me to include more articles like this in future newsletters. I’d love to help you create photos you are proud to share with the camera gear you already have.
I liked the simple language this was written in and the range of photos you used to demonstrate. Also liked it was just one topic. I’m a flower lover not really a photographer, so I like to be able to quickly read and use image choices easily!
Thanks Marshall – glad you enjoyed the post 🙂
I have a pretty good grasp of f-stops and I enjoyed reading it.