
by hankinslawrenceimages | Dec 9, 2016 | Photo Tips
Whether its Kitty Dusty dressed up as Harry Potter or Kitty Ansel in his Santa hat, every time I post a photo of any of our cats dressed up for the holidays I always get asked “How do you do that? How do you get the cats to wear the hats and pose for you?” The secret is – we don’t!

Bill and I did try putting hats on the cats in the past for their photos – we never got any good photos. But we did really annoy the cats (and occasionally have to patch up a bleeding photographer). So we figured out how to do it in Photoshop. With a little practice – you too can dress your fur-kids up for the holidays.
The main Photoshop techniques we use are extracting an object using the “quick select” and “refine edges” commands, and resizing an object using the “free transform” command. We’re not going to go into step by step details on how to use them. Great info on both can easily be found on the web (how do you think we learned how to do this?).
First, we start with a picture of our model, Kitty Ansel. Ansel loves to pose on the posing stool, making this part easy. For those interested, we used a strobe with softbox on camera left, and one with a strip light camera right, set about 1 stop below the main light. Before we had studio lights and such, we put a sheet on the wall for background in a room that had enough window light to photograph the cats.

Next, we use a Teddy bear to photograph the Santa hat in the same light we used for Ansel (this makes the combination look more realistic).

Using the “quick select” tool (located in the same box as the “magic wand” tool, Bill roughly selected the Santa hat, and used the “refine edge” button to refine the selection. He set the refine edge to save the selection as a new layer with layer mask. This gives you a layer showing just the Santa hat.

Now with both the cat photo and the Santa hat photo open, drag the hat layer from the hat file to the cat photo.
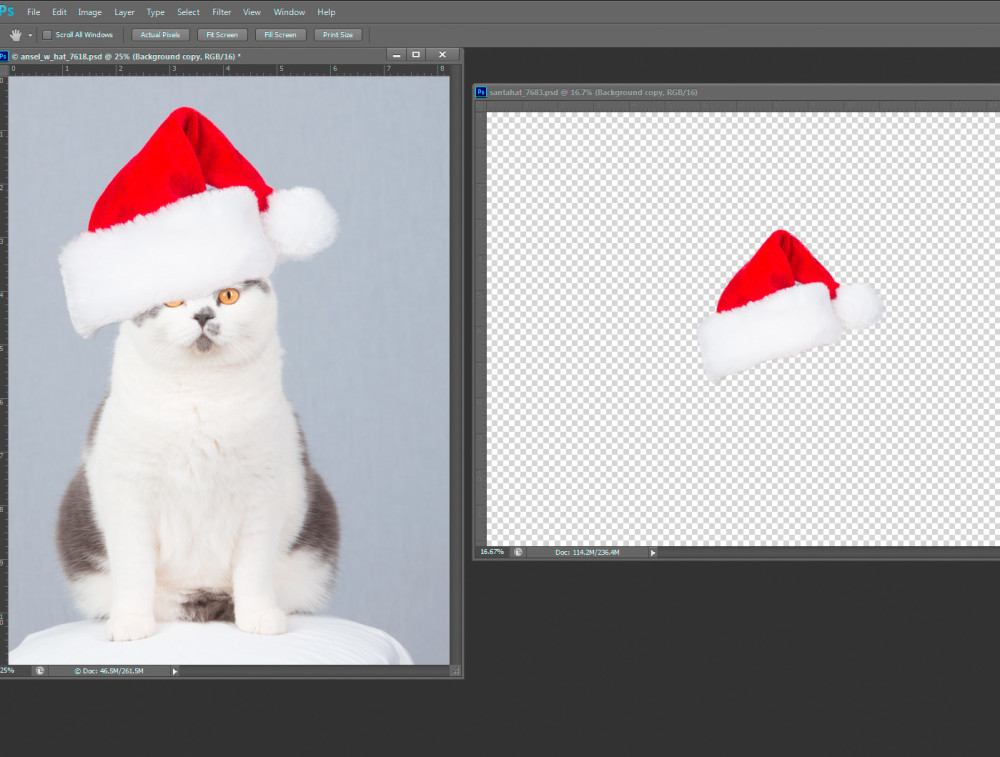
This gives you a hat on top of the cat, although the size and the angle are wrong. The “free transform” tool (Ctrl-T in windows) with the hat layer selected will let you rotate the hat, and change the size so that you can create a hat that fits the cat. To make the combined photo more realistic, Bill used a little darkening curve masked to show under the hat to give the appearance of shadow immediately under the hat.
The final result:

A wonderful photo of Kitty Ansel wearing his Santa hat and no photographers were harmed (or had to visit the ER) in the creation of the photo!

by hankinslawrenceimages | Dec 2, 2016 | Christmas, Photo Tips
Outdoor Christmas lights can be one of the toughest scenes to photograph well. All too often, photos come out too dark, too light, blurry, fuzzy or just plain don’t work. The combination of bright lights and dark backgrounds can make correct exposure a challenge.
One of our neighbors puts up an extensive display of lights each year, which made it easy for us to take several photos for us to use as examples.
Here are my Top 5 Tips that will help you take better photos this holiday season.
1. Turn off the flash. Most on-camera flashes are designed to light up the area 4-6 feet directly in front of the flash, and then darken down anything that is beyond that range. Most holiday light displays are more than 4-6 feet away. So what happens when you don’t turn off the flash is that you light up whatever is directly in front of you (a wall, a tree, the lawn, or people) and put the holiday lights into darkness. Your camera may complain with a bunch of beeps) about not using the flash in the dark, but this is one time when it’s best to override the automatic functions and turn off the flash.
As you can see from this photo, the flash lit up the street sign and the license plate on the car while darken down the rest of the photo.

2. Increase the ISO or film speed. A higher ISO will let you have shorter exposure times. Depending on your camera, you may well be able to shoot at ISO 1600 or above and not end up with noisy photos. At a minimum your camera should be able to create great night photos at ISO 400 that don’t have any obvious digital noise.
At ISO 100, the shutter speed is way too slow, resulting in a fuzzy photo of the lights.

At ISO 400, things are looking a little better.

3. Brace Your Camera. Even with a higher ISO, you’re likely to be shooting exposures longer than a person can easily hold a camera perfectly still. And any camera movement shows up in the pictures as blurry lights. The best thing to use is a tripod. If you don’t have a tripod, place your camera on a table object, like a wall or a table, and use the self-timer to take the picture. If there’s nothing available to put your camera on, try leaning against a tree or a pole to help keep yourself steady.
Here’s the neighbor’s lights photographed with the camera on a tripod.
 4. Set Your Camera Before You Go Out. If you’re just planning on photographing lights one evening, adjust your camera settings before you leave home. It’s much easier to set everything in the light, when you have your manual close at hand if you need it – rather than in the dark somewhere, with gloves or mittens on (or with very cold fingers).
5. Take Lots of Photos. Be sure to take lots of photos of the lights, including some from different exposures and compositions. Your first shot may not be your best one. Besides, if you’re shooting with a digital camera, you can always delete the ones you don’t like.
I hope these tips will help you take some photos that will help you remember the holiday season with joy rather than frustration over bad photos
P.S Don’t forget to dress for the weather. It’s easy to get cold standing around taking photos at night. Remember, photography is supposed to be fun, and it’s hard to have fun when all you can think about is how cold your fingers and toes are.

by hankinslawrenceimages | Nov 25, 2016 | Photo Tips, Software, Uncategorized
This is the third article in my series on how I organize my photo files so I can find the photos I want when I need them. In case you missed them, the first two articles in the series are How I Organize My Photo Files on my Computer and How I Organize My Photos in Lightroom.
I post a lot of photos on my blog – this year alone I’ve shared over 1000 photos (not to mention the over 5000 I’ve shared before this year) – which means I’ve had to come up with an awful lot of different names for my photos so I don’t accidentally give two the same name and not be able to tell them apart. I tried several naming conventions over the years and finally in mid-2012 I came up with one that works for me and I’ve continued to use it since then. I thought I’d share it with you today in case something similar might work for you.
The basic format for the file names is YYYY_MM_Description_####.jpg where
YYYY is the year I edited the photograph – so I know what date to put on the copyright notice.
MM is the month I edited the photograph.
Description is a few word description of the photo so I can search for it more quickly, and
is the four digit file number assigned to the original RAW file by my camera.
So the first file in the list of edited photos for this year is
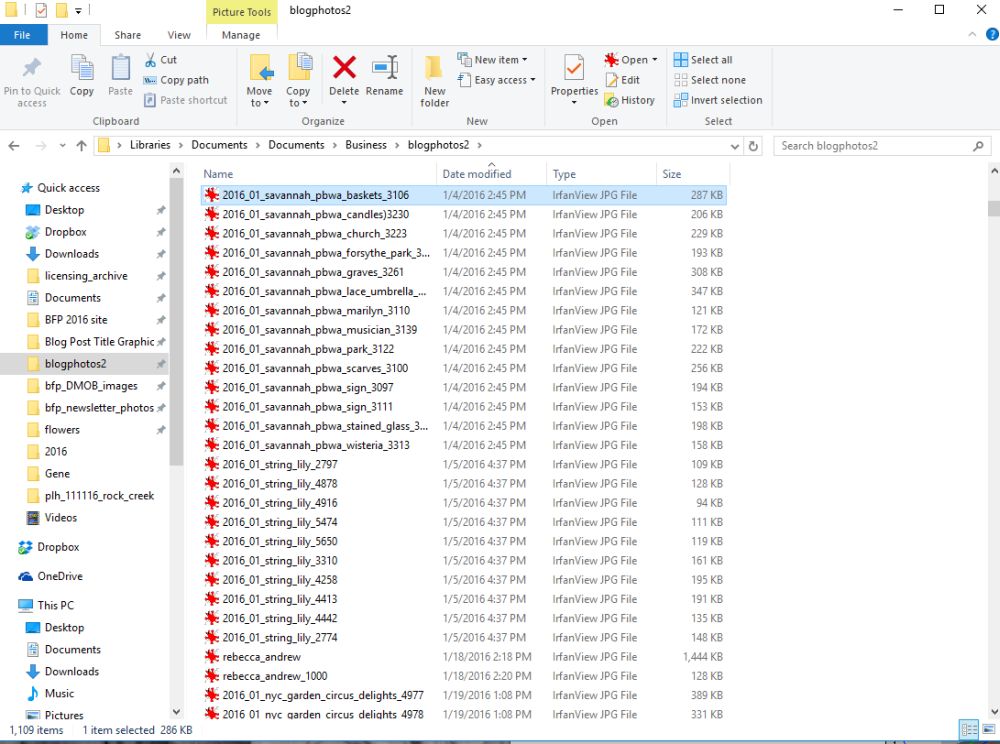
2016_01_savannah_pbwa_baskets_3106 – a photograph of baskets taken in Savannah, Ga that I edited on January 4, 2016
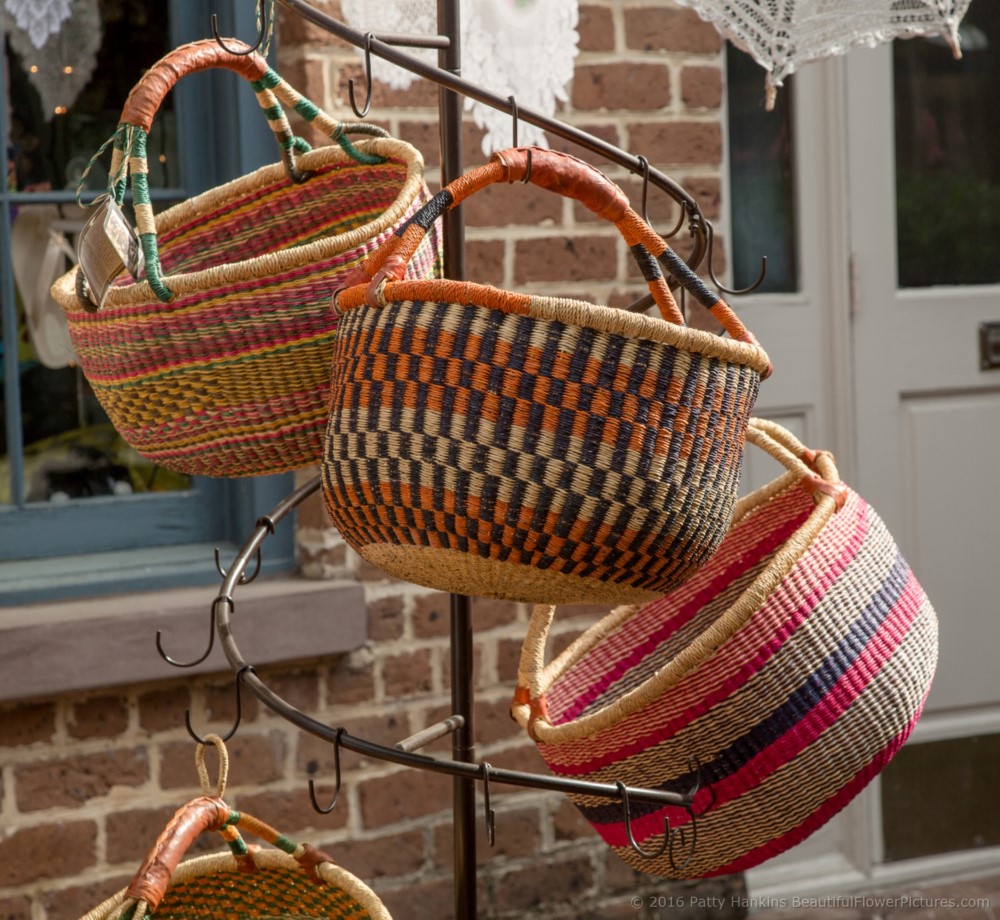
Baskets at Savannah’s City Market © 2016 Patty Hankins
And the most recent file is 2016_11_chrysanthemum_bill_holden_7485.jpg – a photo of a Bill Holden Chrysanthemum I took at Longwood Gardens on November 13.
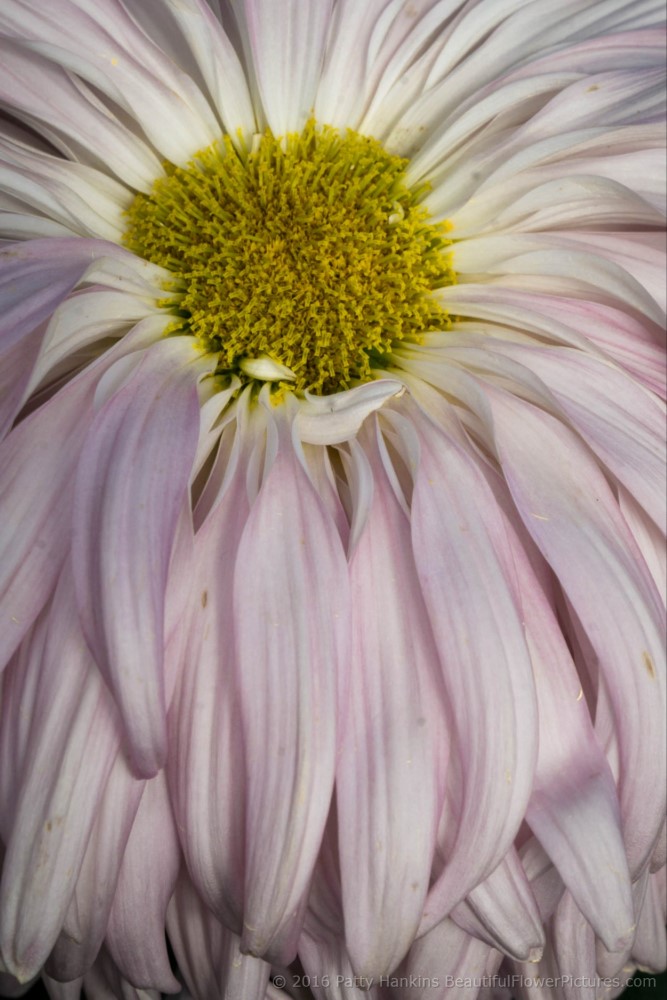
Bill Holden Chrysanthemum © 2016 Patty Hankins
The search functions in Windows 10 lets me easily find the edited photos on my computer.
As an example, let’s say I know I photographed a Bill Holden Chrysanthem but I can’t remember when I took the photo. All I have to do is go to the Blogphotos directory on my hard drive and search for Bill Holden. Once it pulls up all the photos with Bill Holden in the title, I just choose the one I want.
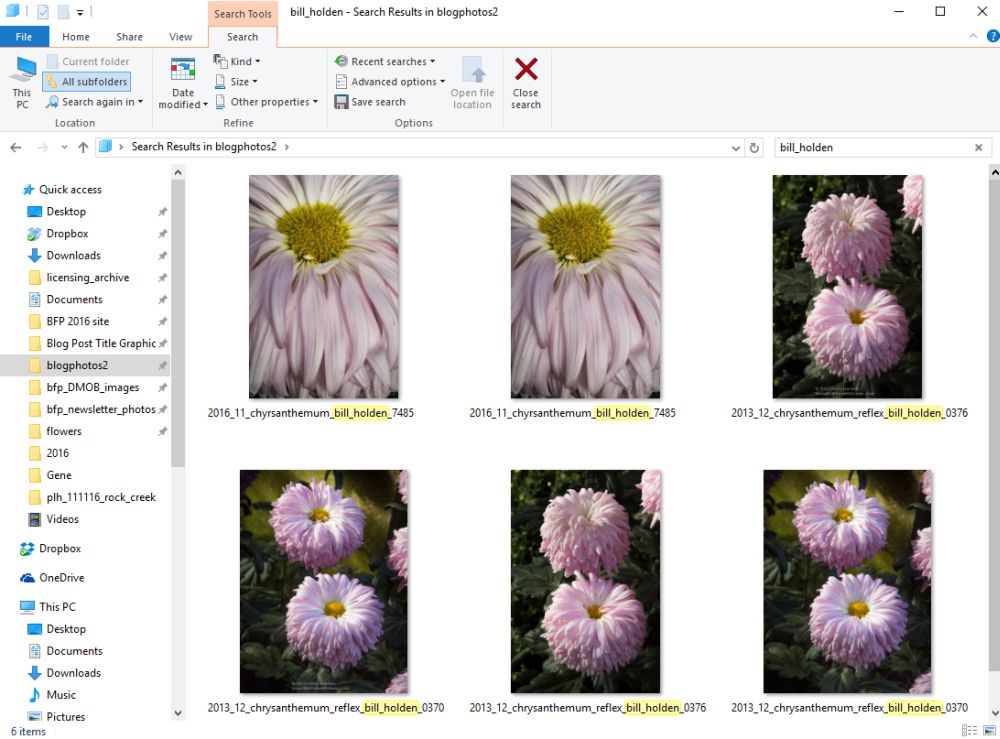
Windows Search for Bill Holden Chrysanthemum
Or if I know the last four digits of the file are 7485, I can search for all files with the code 7485.
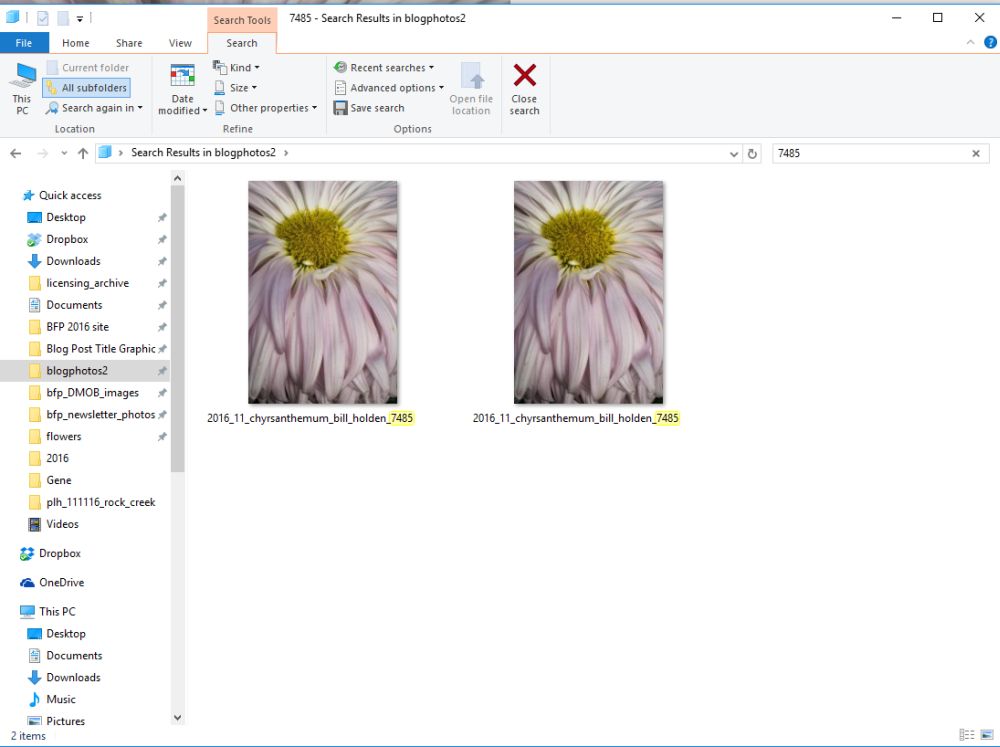
Windows Search for 7485
If I want to get back to the original image I can use the same information in the file name to access the my original RAW file in Lightroom.
Searching for 3106 brings up all the photos Bill or I have added to Lightroom with the file number 3106.
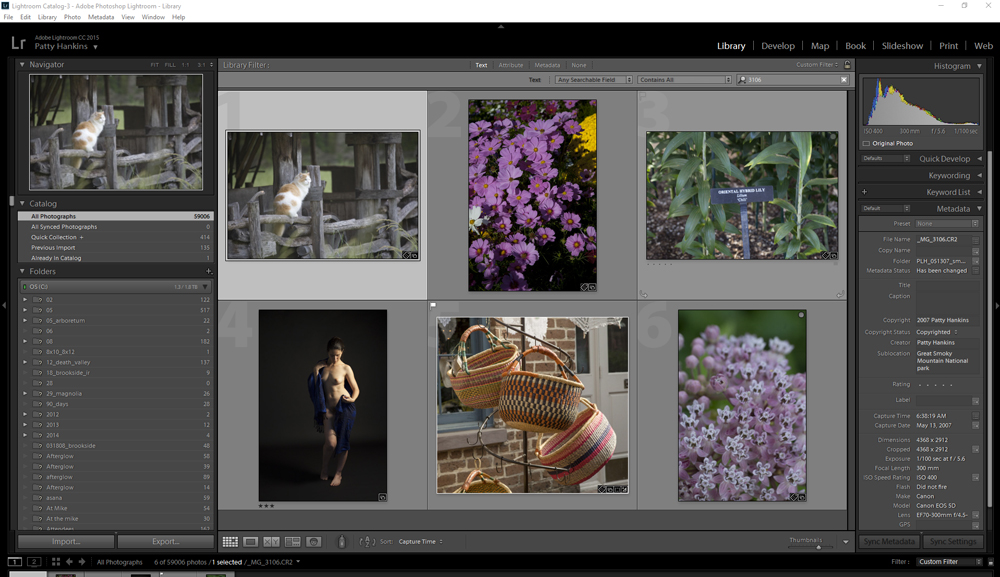
Files numbered 3106
Or I can search for photos with the keyword basket (and it turns out there is only one of those!)

Files with the keyword basket
I hope these this series of three articles make it easier for you to find your files on your computer. If yo have any questions about how I name my files, just let me know.

by hankinslawrenceimages | Nov 11, 2016 | Photo Tips, Uncategorized
Recently I was talking with a friend about why I’ve been doing so much studio photography lately. One of the main reasons is that I can control the light on my subject when I’m in the studio. When I’m photographing at a garden or in a park – I have to work with the light I find – and sometimes it’s just not very conducive for creating the photos I want to create.
In the studio, things are totally different. By using multiple lights, I can control which areas of the flowers are in light and which are in the shadows. I can also control how deep the shadows are.
Rather than spend more time trying to explain it – I thought I’d just show you some examples of how different combinations of light make a difference in my photos.
I usually have one light as my main light for the overall brightness of the scene, and then a second light down a stop or two to create some interesting shadows and sense of depth in my photos.
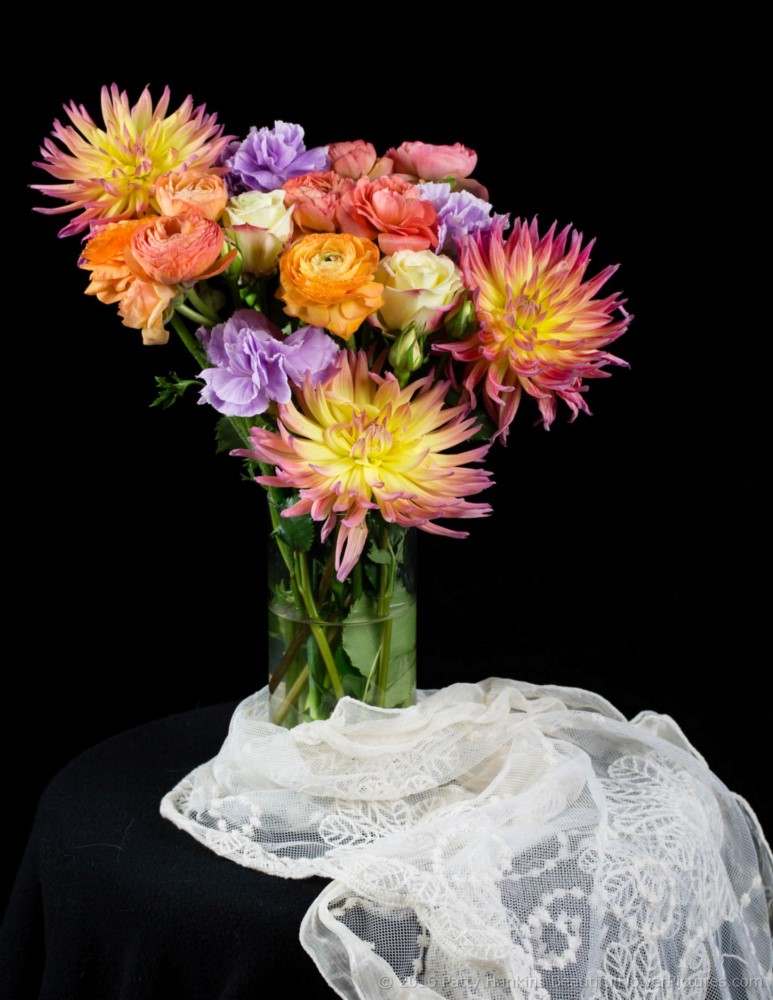
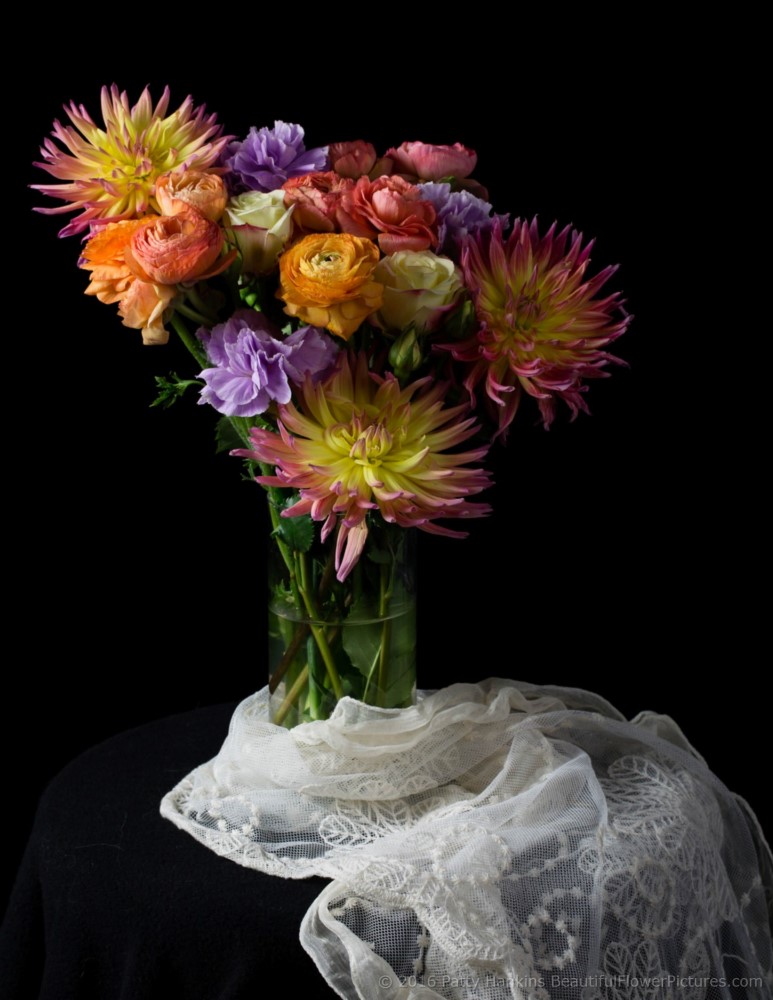
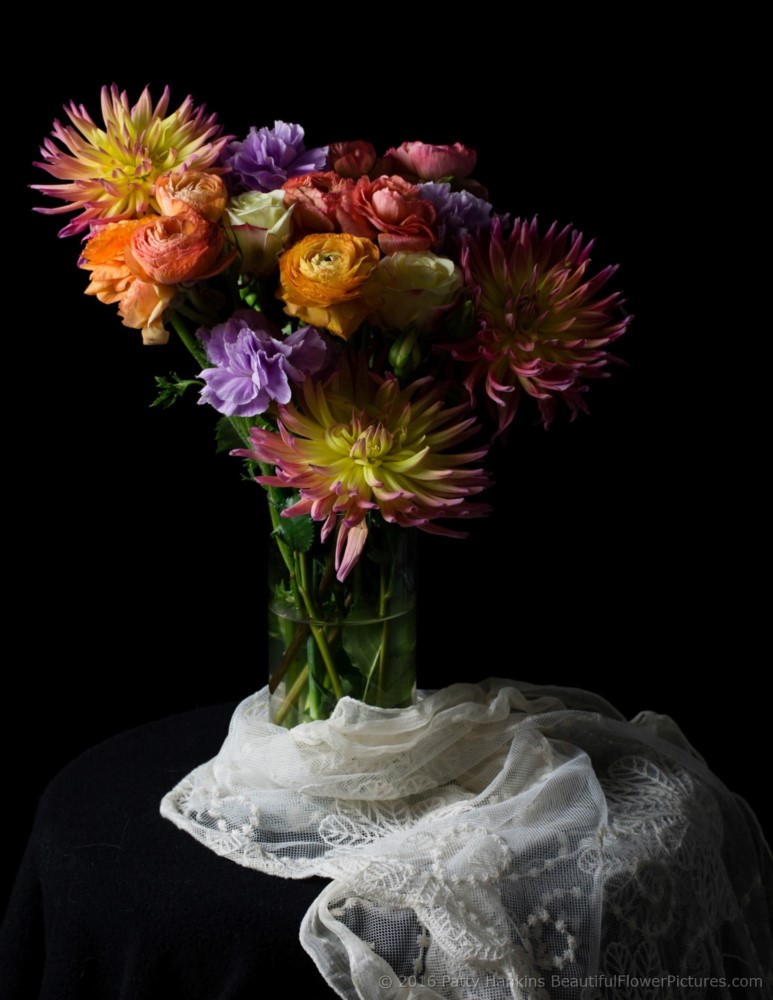
This first set of photos were taken under two lights in my studio – one to the right of the floral arrangement and one to the left. For all four photos, my camera settings were ISO 100, f 11, 1/15 sec. The only change I made to the photos in Lightroom were a bit of cropping and converting them from RAW files to JPGs.
In this first photo, both lights are at full power.
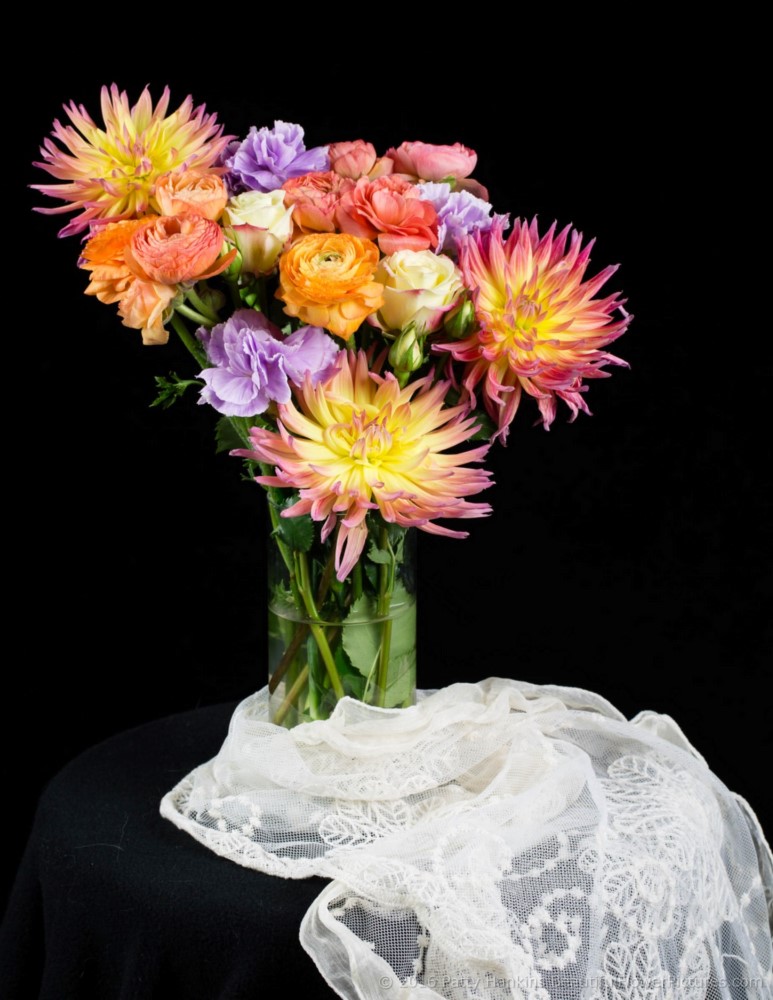
In the second photo, the light to the right is at half power, while the light on the left is still at full power. You can start to see more shadows in this photo compared to the first one.
In the third photo, the light on the right is at minimal power, while the light on the left is still at full power. The difference in the photos becomes more dramatic as the difference in the light levels increases.
And in the fourth photo, the light on the right is off, while the light on the left is still at full power. This gives a very directional feel to the light in the photo, similar to light coming through a window into a darkened room.
As another example, I photographed a pair of papaya calla lilies to show how changing the light levels on different sides can create very different looks. All of these photos were taken at ISO 100, f 16, 1/3 sec. Again the only edits made in the Lightroom were cropping the photos and converting from RAW to JPG.
Both lights at full power
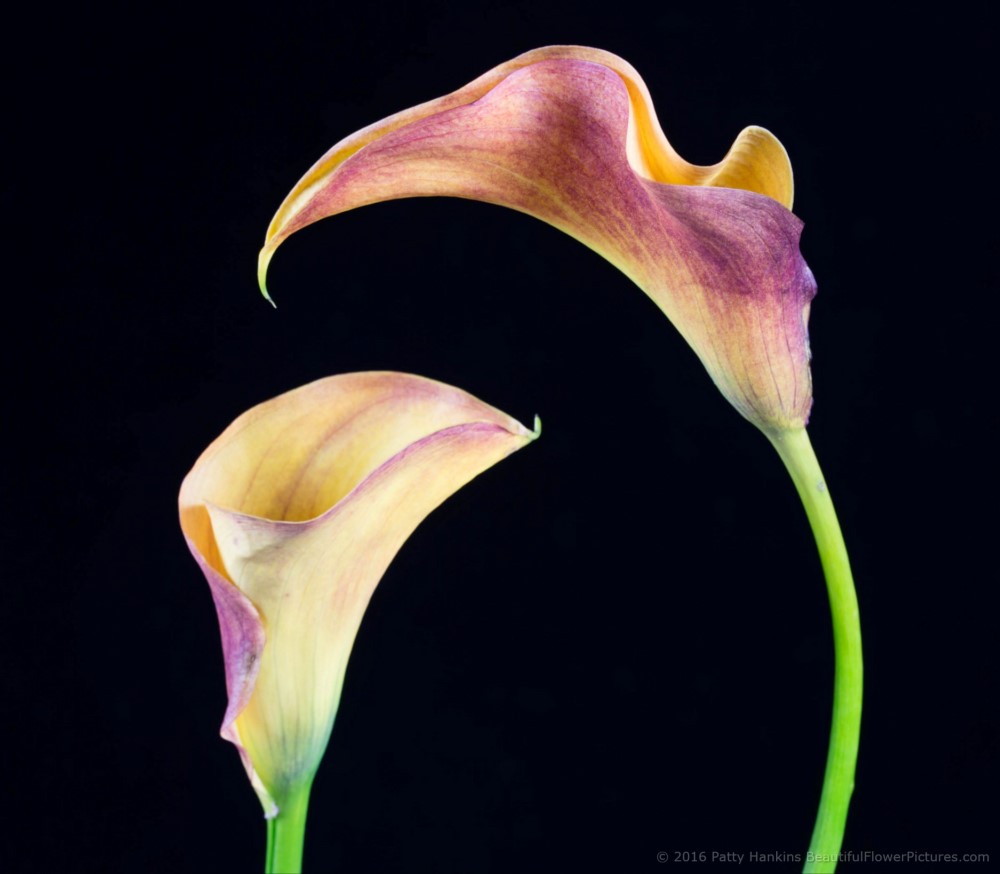
Light to the right at full power, light to the left at half power.
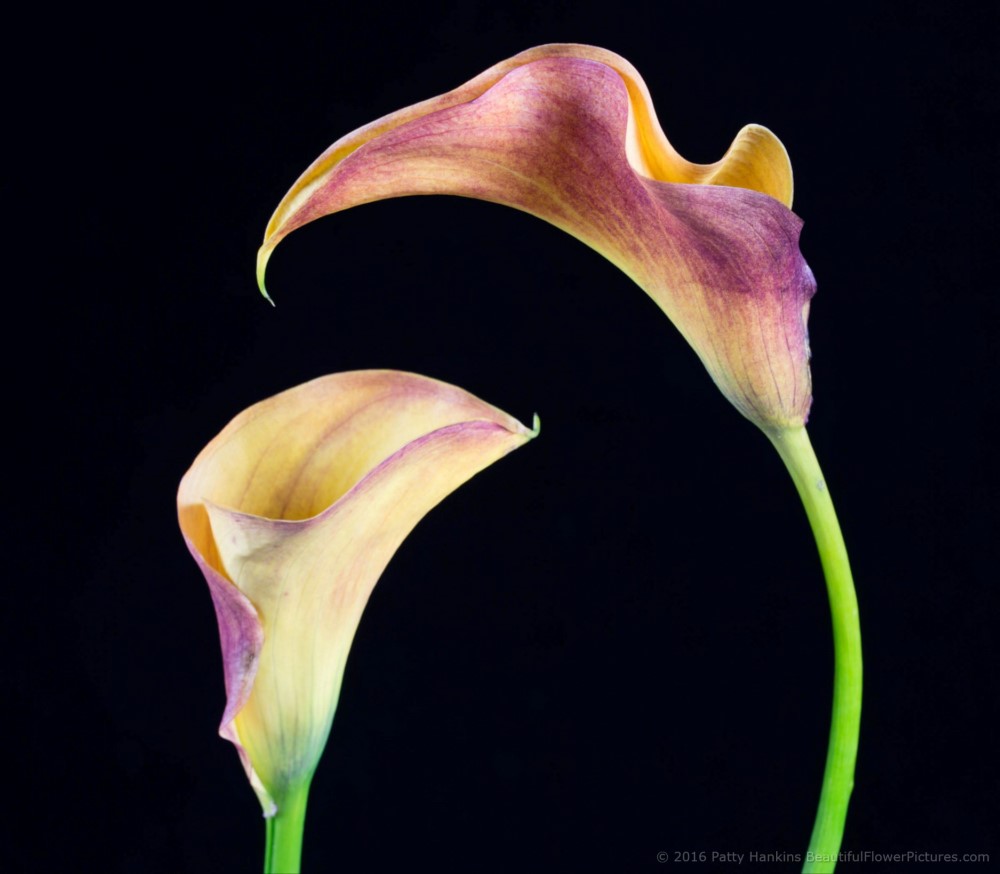
Light to the right at full power, light to the left at low power.
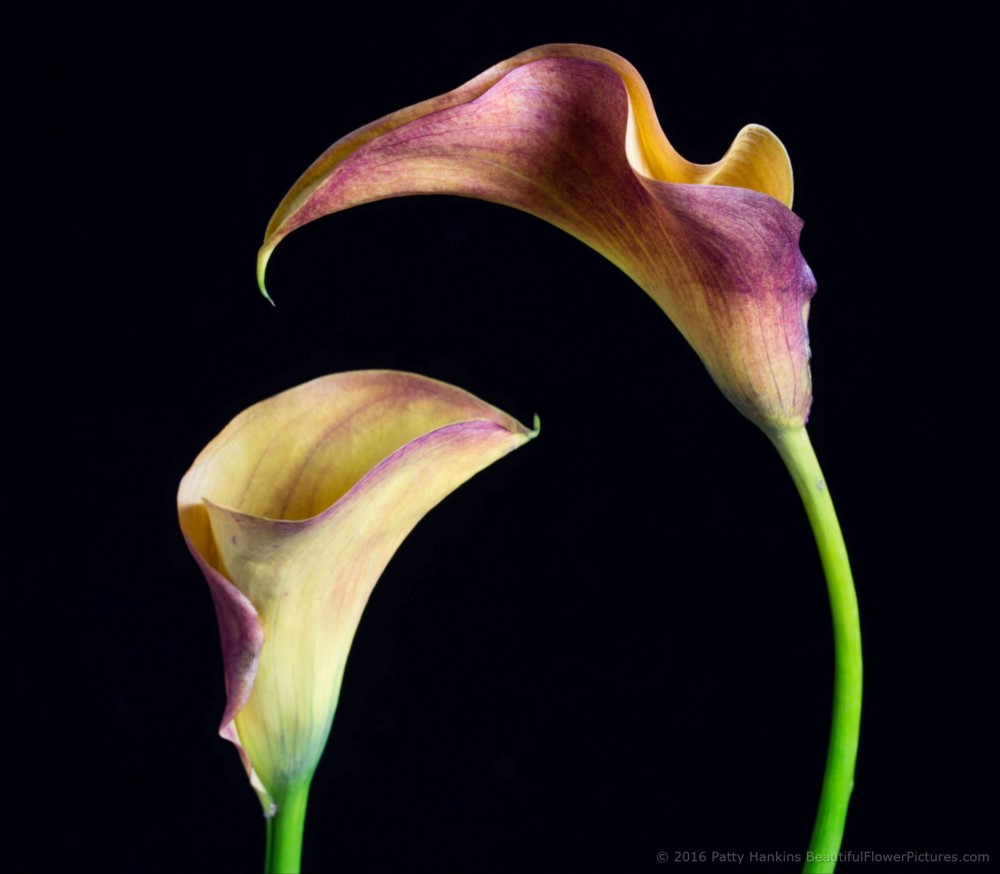
Light to the right at full power, light to the left turned off.
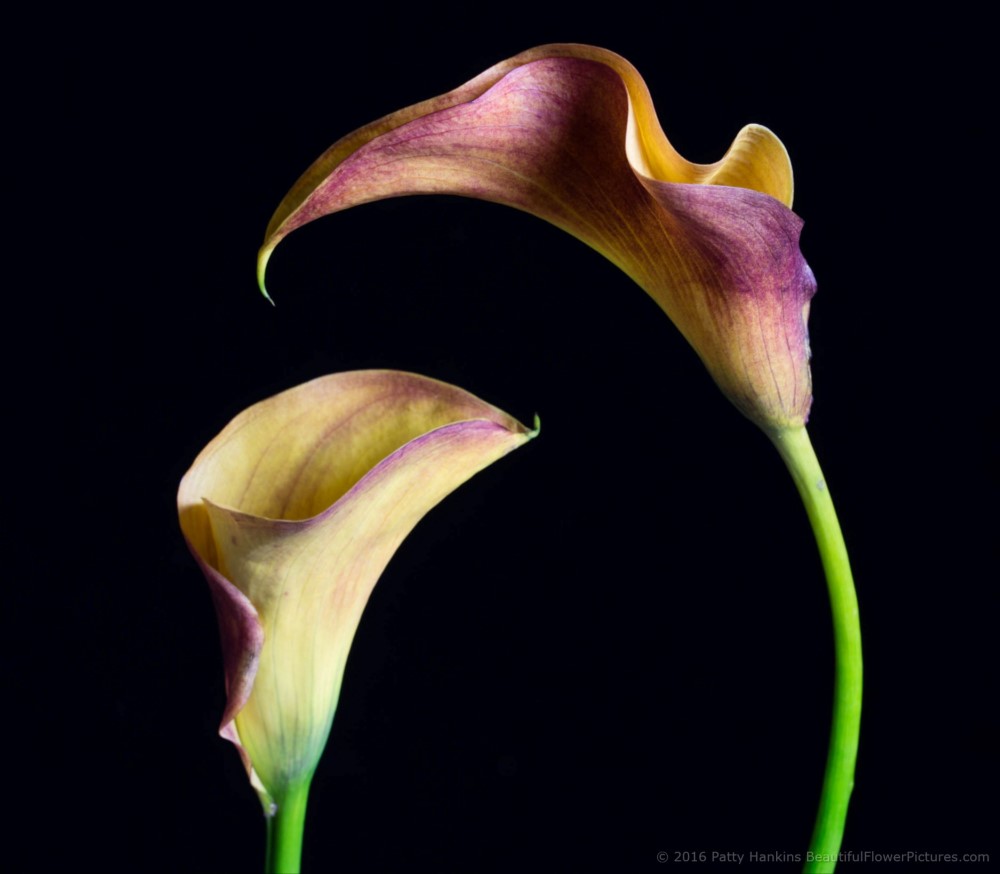
Light to the left at full power, light to the right at half power.
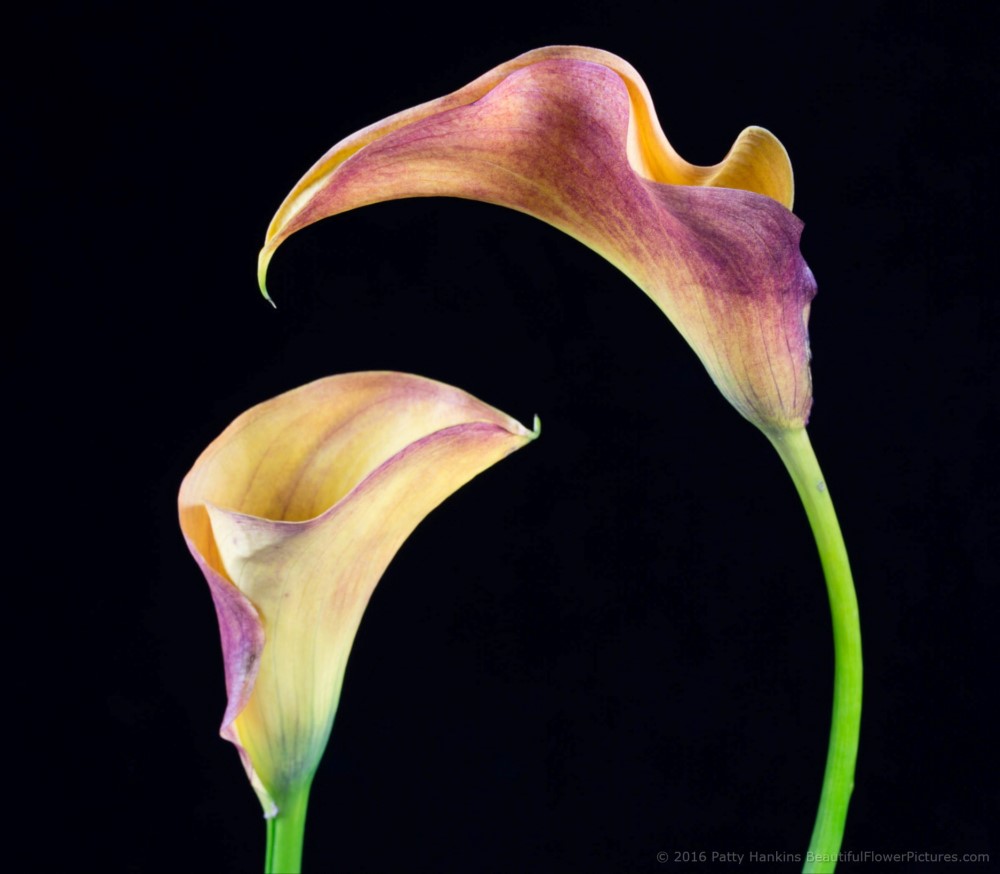
Light to the left at full power, light to the right at low power.
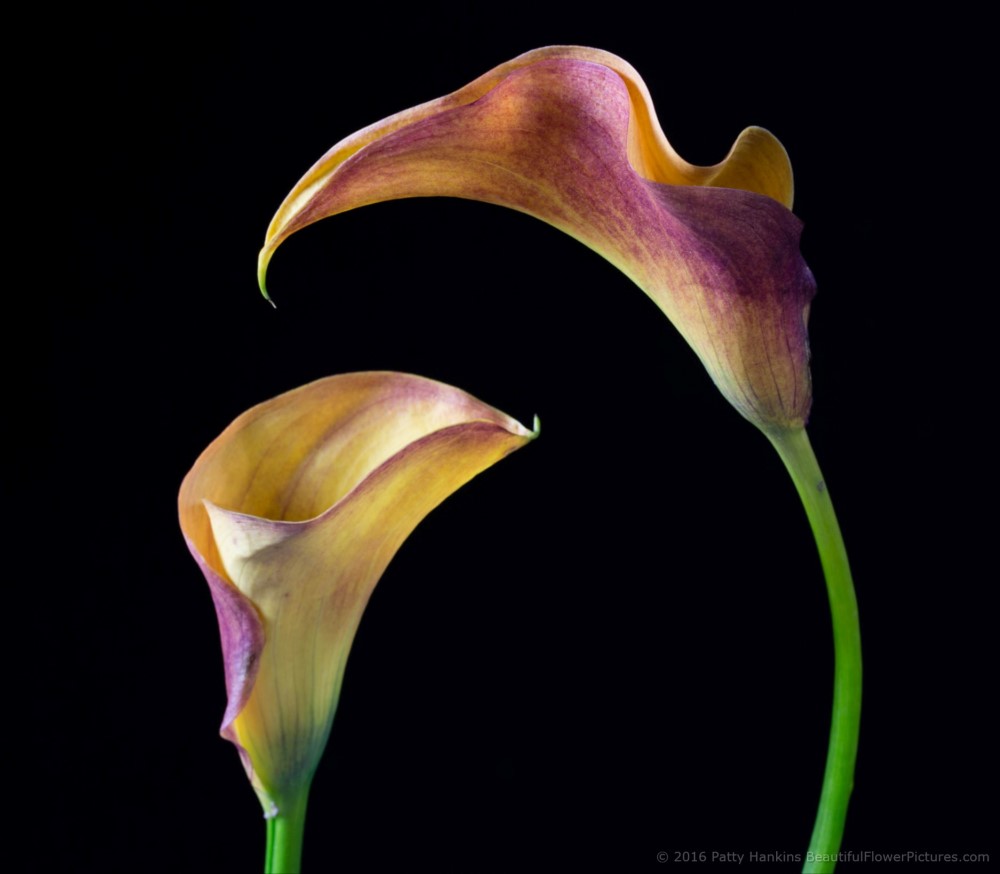
Light to the left at full power, light to the right turned off.
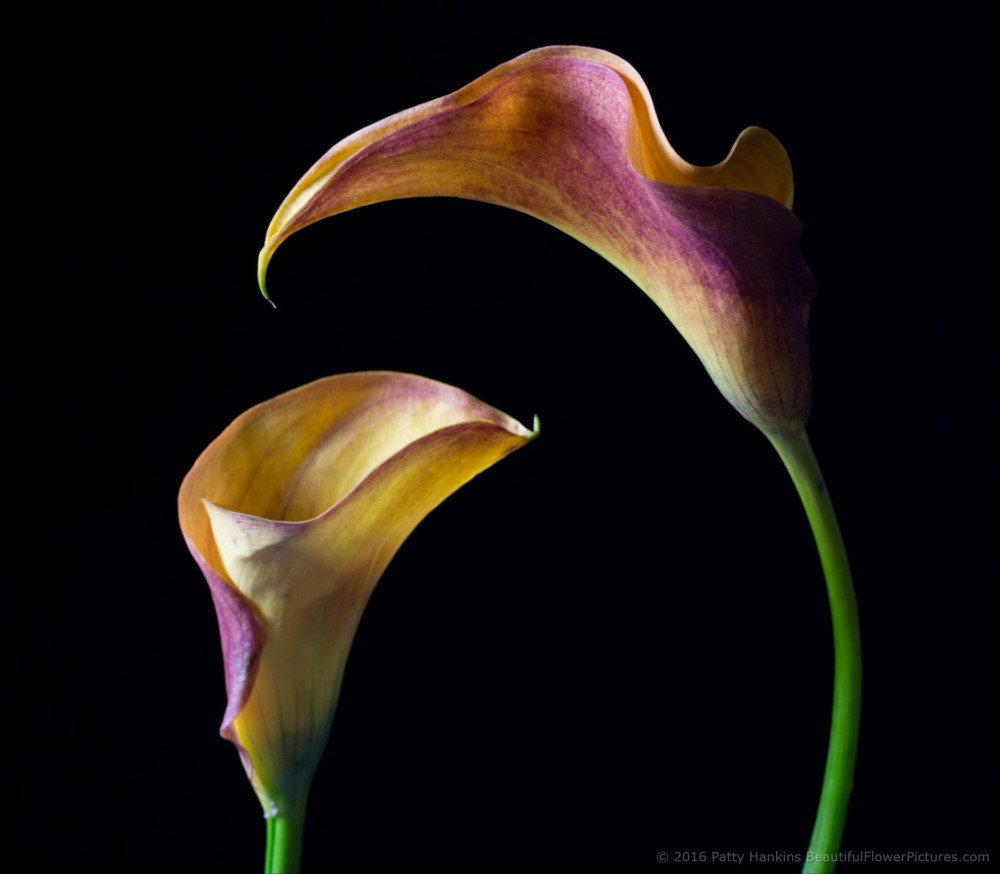
As you can see, choosing different levels of light on your subject can create very different looks in your final photos.
Working with different levels of light to create your photos is one of the things Bill and I work with our students on in our Photographing Flowers in the Studio workshop. We’ll be teaching this workshop on Sunday January 15, 2017 in Bethesda, MD. You can learn more about the workshop, including registration info on my website at http://beautifulflowerpictures.com/photographing-flowers-studio-workshop-jan-2017/
I’d love to have you join me for the workshop. Feel free to email me if you have any questions about the workshop.

by hankinslawrenceimages | Oct 7, 2016 | Photo Tips
Last month I shared How I Organize My Photo Files on My Computer with you. Today, I’m sharing another part of my photo file organizational system – how I organize my photographs using Lightroom Collections.
I use a program called Lightroom from Adobe to organize and edit my photos. One section of the program – the Library Module – is designed to help photographers organize their files so we can find them quickly.
The best way I’ve found to describe the Library Module is to think of it as a giant card catalog – where the photos are the individual books in the library that you can find using the card catalog. And since I’m old enough to have used card catalogs at libraries all the way through getting my first master’s degree – the system makes perfect sense to me. Just like you can find a specific book in a card catalog by title, author and mutiple subjects – I can find photos in my Lightroom library by date and multiple subjects.
As an example – here’s a photo I took of a Jason Hibiscus at Longwood Gardens on December 15, 2008.

The first place I can look for the photo is in the Folders section of the Lightroom Develop Module. This is simply an alphabetical list of the folders with files that I have imported into Lightroom. So as I explained in my previous article – this photo taken on December 2008 at Longwood Gardens can be found in the folder plh_121508_longwood_flowers in the 12 subfolder of the 2008 folder. And you can see it here in the Folders section in Lightroom

To be able to find the file easily this way – I’d need to remember the exact date I took the photo on. And in most cases I have no clue what the date I took a photo on several years ago. Fortunately, Lightroom’s Library Module also has collections that function as the subject categories in a card catalog. And you can file a photo under as many subjects (or in as many collections) as you want.
My collection sets (groups of collections) are based on broad categories of things I photograph. So I have collections sets for flowers, state and national parks, places, models photographed in the studio, flowers photographed in a studio, etc. Here’s what my top level Collection Sets list looks like.

In my Collection Sets I have two obvious places to look for the file for the Jason Hibiscus. The first is in the Flowers Category Set – and the second is in the Places Category Set.
Within the Flowers Collection Set, I have collections for each type of flowers – lilies, roses, orchids, etc – that I’ve photographed. The Flowers Collection Set shows all the photos I’ve put in any of the flower specific collections.

Within the Flowers Collection Set is a Collection called Hibiscus – which is where I can find all of my hibiscus photos, including the Jason Hibiscus I photographed in December 2008. You can see the original uncropped, unedited version of the photo highlighted as the first photo in the set.

Of if for some reason I can’t remember what type of flower the photo I’m looking for is – I can always look for it by location. In the places Collection Set – there are Collection Sets for all the states I’ve photographed in. And within each of the state folders, are folders for specific locations. Since I knew the photo was taken at Longwood Gardens in Pennsylvania – I can look in the Places Collection Set in the Pennsylvania Collection Set to find all the places I’ve photographed in Pennsylvania.

I could find the Jason Hibiscus photo by scrolling through all my photos taken in Pennsylvania to find the right one – or I can look in the Longwood Gardens Collection to just see all the photos I’ve taken at Longwood Gardens.

What I love about the Collections in Lightroom’s Library module is that I can create an organizational structure that works for me and the types of things I tend to photograph. And the structure i create only needs to make sense to me. Which means you too can create a organizational system in Lightroom’s Library Module that works for your needs and what you photograph. You don’t have to adapt someone else’s organizational system to fit your needs!
I hope this explanation helps you understand how I organize my photos using Lightroom’s Library module. In my next article in this series (probably early next month), I’ll explain how I use keywords and file names to help me quickly find any edited photo file or the original unedited file for that photo in just a few seconds.
If you have any questions about how I use Lightroom’s Library Module to organize my photos, please drop me a note and I’ll try to answer any questions in a future blog post.

by hankinslawrenceimages | Sep 9, 2016 | Photo Tips
One of the conversations I seem to have over and over again is talking about how I organize my photo files on my computer. I’ve met people with everything from very complex systems involving dates, locations, subjects, etc to having all their photos in one directory on their computer (usually My Photos or My Pictures). And one thing many of them have in common is they can never find a particular photo they want without lots of searching.
Over the years, Bill and I have developed a system that works for us – so I thought I’d start sharing it with you today – in case it will help any of you organize your photos on your computer and make it easier for you to find your photos on your computer. I’d originally thought to describe my entire system in one newsletter – but realized that would be way too long – so I’m going to split it up over several newsletter. Today, I’ll be sharing how I structure the file directory on my computer.
Since I weed through my photos and delete ones I know I’ll never process, I have two sets of directories of photos – one of unweeded photos – and the other of ones that I have sorted through. I see no point in adding files that I know I’ll never process to my archives since they’ll only take up more space on my drives. As of early September, I have over 66,000 files in my unweeded file system. My guess is at least 40-50% of these files will be deleted before I add them to my main image filing system.
In my permanent directories of image files I have over 88,000 images.

Within my directory of Original Image Files – my first sorting of files is by year.

Within each year – files are sorted by month

And then within the month folder – by date and topic. Originally I just stored all the photos from specific date within a single folder. But over time I realized those folders could be a bit overwhelming – especially at times like when I head to Longwood Gardens in December.
What I do now is separate the photos into folder by date and subject and put enough info in the name of the folder so I have a good idea what is in the folder.

Once I’ve sorted the photos into these folders, I add them into Adobe Lightroom, the program I use to index my files and do preliminary edits on them. I’ll share more about how I use Lightroom in another post soon.
But even without adding the photos to Lightroom and indexing them, the file structure I’ve set up lets me find photos reasonably easily – especially photos of flowers that bloom at a specific time of year. If I want to see my photographs of Virginia Bluebells – all I have to do is go back to the April folder for each year – and look for folders labeled bluebells.
I hope this peek at how I organize my photo files on my computer is helpful. If you have any questions about how I organize then, leave a comment below and I’ll be happy to answer them.


 4. Set Your Camera Before You Go Out. If you’re just planning on photographing lights one evening, adjust your camera settings before you leave home. It’s much easier to set everything in the light, when you have your manual close at hand if you need it – rather than in the dark somewhere, with gloves or mittens on (or with very cold fingers).


