
by hankinslawrenceimages | Dec 11, 2015 | Christmas, Photo Tips
Outdoor Christmas lights can be one of the toughest scenes to photograph well. All too often, photos come out too dark, too light, blurry, fuzzy or just plain don’t work. The combination of bright lights and dark backgrounds can make correct exposure a challenge.
One of our neighbors puts up an extensive display of lights each year, which made it easy for us to take several photos for us to use as examples.
Here are my Top 5 Tips that will help you take better photos this holiday season.
- Turn off the flash. Most on-camera flashes are designed to light up the area 4-6 feet directly in front of the flash, and then darken down anything that is beyond that range. Most holiday light displays are more than 4-6 feet away. So what happens when you don’t turn off the flash is that you light up whatever is directly in front of you (a wall, a tree, the lawn, or people) and put the holiday lights into darkness. Your camera may complain with a bunch of beeps) about not using the flash in the dark, but this is one time when it’s best to override the automatic functions and turn off the flash.
As you can see from this photo, the flash lit up the street sign and the license plate on the car while darken down the rest of the photo.

- Increase the ISO or film speed. A higher ISO will let you have shorter exposure times. Depending on your camera, you may well be able to shoot at ISO 1600 or above and not end up with noisy photos. At a minimum your camera should be able to create great night photos at ISO 400 that don’t have any obvious digital noise.
At ISO 100, the shutter speed is way too slow, resulting in a fuzzy photo of the lights.

At ISO 400, things are looking a little better.

3. Brace Your Camera. Even with a higher ISO, you’re likely to be shooting exposures longer than a person can easily hold a camera perfectly still. And any camera movement shows up in the pictures as blurry lights. The best thing to use is a tripod. If you don’t have a tripod, place your camera on a table object, like a wall or a table, and use the self-timer to take the picture. If there’s nothing available to put your camera on, try leaning against a tree or a pole to help keep yourself steady.
Here’s the neighbor’s lights photographed with the camera on a tripod.

- Set Your Camera Before You Go Out. If you’re just planning on photographing lights one evening, adjust your camera settings before you leave home. It’s much easier to set everything in the light, when you have your manual close at hand if you need it – rather than in the dark somewhere, with gloves or mittens on (or with very cold fingers).
- Take Lots of Photos. Be sure to take lots of photos of the lights, including some from different exposures and compositions. Your first shot may not be your best one. Besides, if you’re shooting with a digital camera, you can always delete the ones you don’t like.
I hope these tips will help you take some photos that will help you remember the holiday season with joy rather than frustration over bad photos
P.S Don’t forget to dress for the weather. It’s easy to get cold standing around taking photos at night. Remember, photography is supposed to be fun, and it’s hard to have fun when all you can think about is how cold your fingers and toes are.
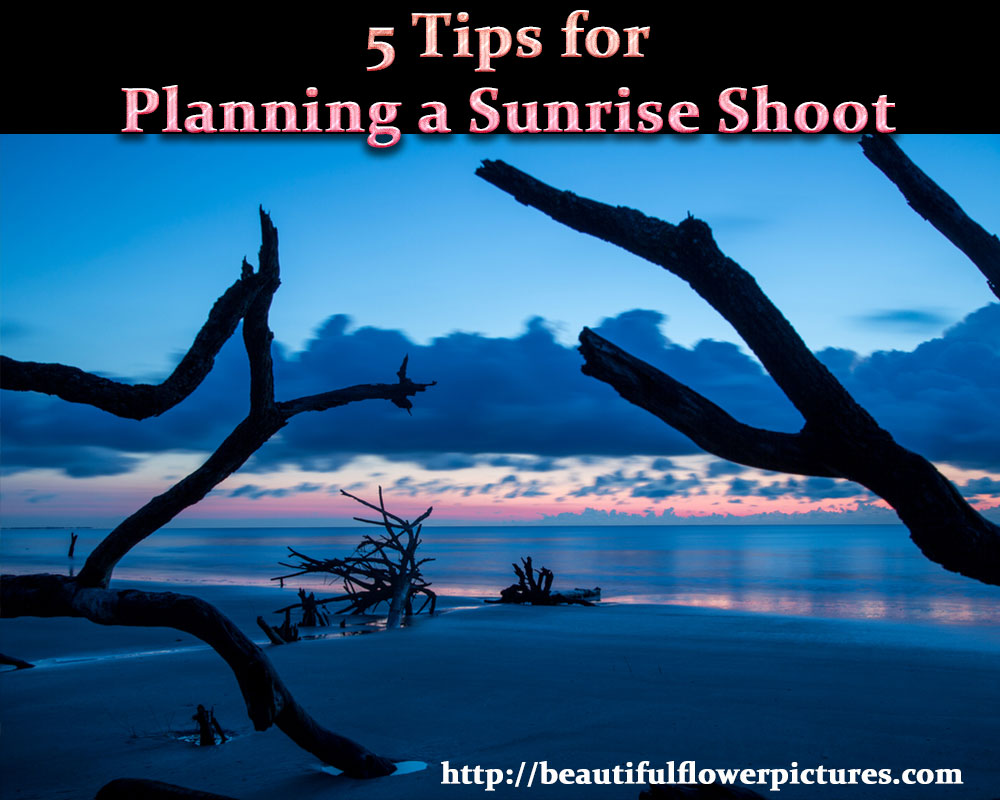
by hankinslawrenceimages | Sep 18, 2015 | Photo Tips
One of the best things about being a photographer is that I get to spend time in nature in beautiful places. I get to see and photograph sunrises and sunsets, mountain views, running water and all sorts of flowers. People always say – you’re so lucky you get to see these sights – and I am. But what many people don’t realize is how much work goes into making sure I’m in the right spot at the right time to capture the photographs that I do.
After I shared my article last month on planning a photo trip (a friend asked how do I specifically plan a sunrise shoot – espeically if it’s somewhere you haven’t been before. After thinking about it – I came up with my Five Tips for Planning a Sunrise Shoot.

First thing I do when I’m planning on photographing a sunrise is to see what information I can find on the web about the location I’m going to be visiting. So I’ll do a quick check on google for “photography guide” and the location. I’ll also check Google Images and Pinterest for “sunrise” and the location. This usually gives me a good idea on what other photographers have found to photograph there – and what sorts of spots I should be looking for.
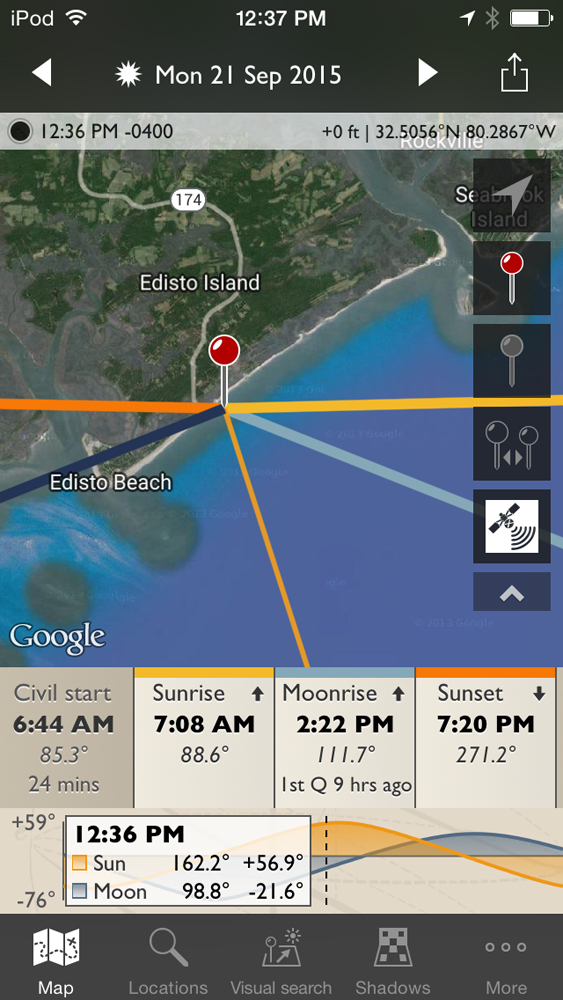
The next thing I do is figure out exactly when and where the sun will be coming up. There are any number of great apps available to help photographers plan their shoots. Photopills and the Photographers Ephemeris provide very detailed information about when/where you can find the sun, and the moon for almost every location on the planet. Here’s the information from The Photographer’s Ephemeris for one of the locations I’m looking at for next week – Edisto Island, South Carolina. Sunrise will be at 7:08 AM and it will be coming up at 88.6°. I’ll actually want to get there about 30-45 minutes before sunrise – so I can capture the soft dawn light.
Scouting the location in person before the day I’m planning on photographing sunrise is probably the most important action I take. I’ll drive out to the location and start walking around – looking for interesting objects to put in my photograph such as driftwood on a beach or a stand of trees I’m like to include in my photo. I’ll pull out my compass and see where these objects are in relation to where the sun is coming up. And then once I’ve found a location (or even better – two locations) I’ll mark them in my GPS so I can find that same spot in the dark.
On my spring trip to South Carolina I planned on photographing a sunrise from Hunting Island State Park. From everything I’d seen – some of the best locations were at the southern end of the park. When I went out scouting – I discovered that my prefered locations were about a mile down a trail from a parking lot. Since I was going to be out alone – I knew I needed an alternate location. The combination a mile-long dark trail with tree roots and rocks to walk around – and me carrying a backpack full of camera gear and my tripod is a recipe for disaster. Chances are I’d end up tripping over a tree root in the dark and end up in an ER rather than photographing sunrise.
So I kept looking – and found a small beach with some downed trees and driftwood – just north of the lighthouse. The spot was not far from the parking lot – with a clear path down to the beach. This is one of the photos I took that morning.
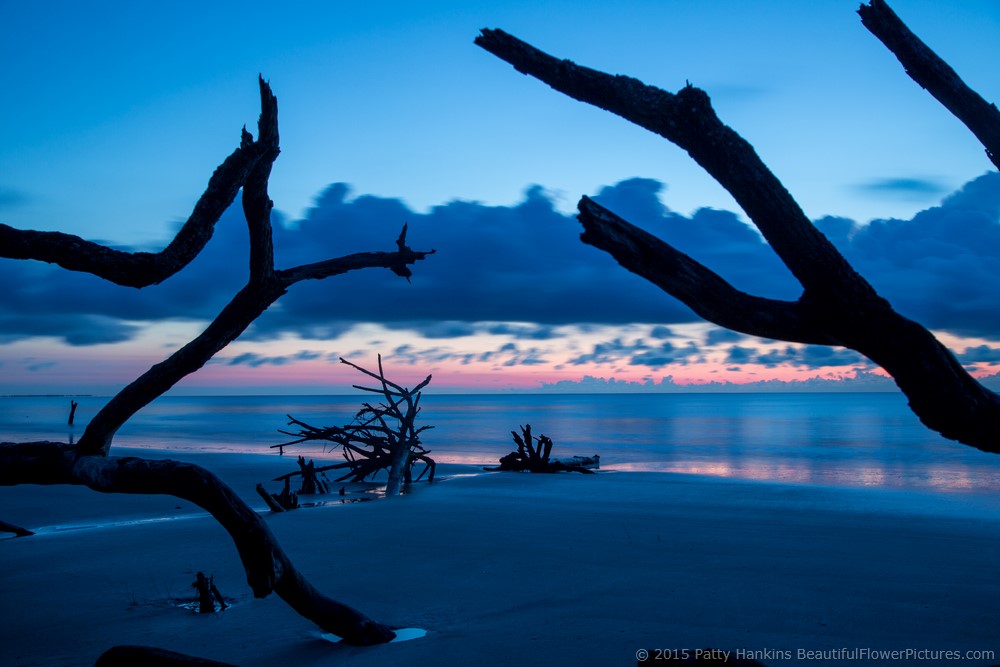
Sunrise at Hunting Island State Park © 2015 Patty Hankins
When I’m out scouting, I not only look for the spot I’m going to be photographing the sunrise, I also look for a nearby location where I can take advantage of the golden morning light. Once the sun has crossed the horizon – often the best light is 180° away from the sun. Here’s one of the photos I took at Assateague National Seashore in February after photographing the sun coming up over the Atlantic Ocean.
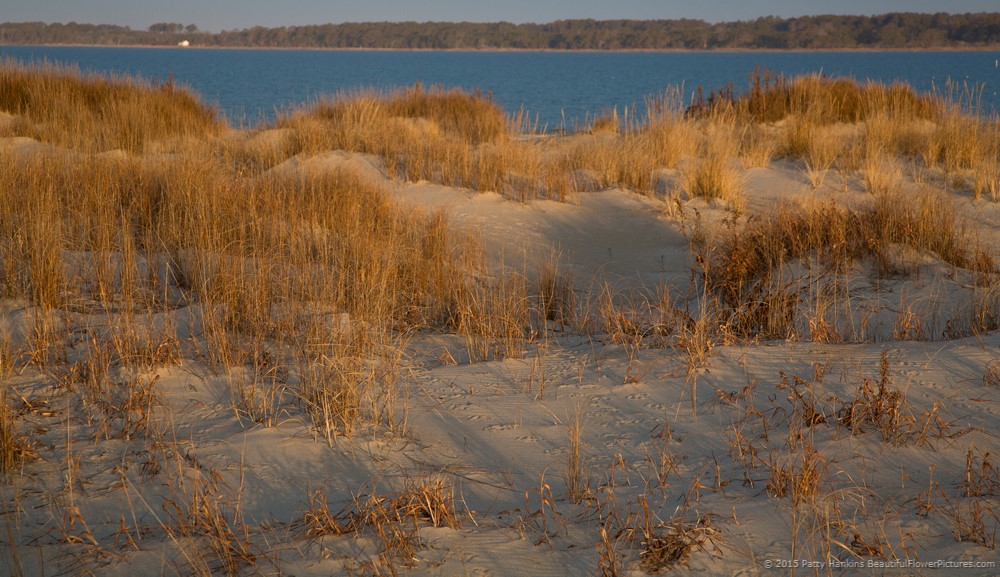
Morning Light on the Dunes at Assateague National Seashore © 2015 Patty Hankins
Once I’m back home or at my hotel, I make sure to get all my gear together and in one place so I can grab it and head out the door rather than having to look all over the place for it early in the morning. I make sure I have fully charged batteries and extra SD cards. I’ll set my camera to the settings I usually use for sunrise – aperture priority, ISO 100 and f11. I check to make sure my tripod plate is securely attached and that everything is working on my tripod. I’ll also attach a small flashlight to my pack so I can find it in the dark.
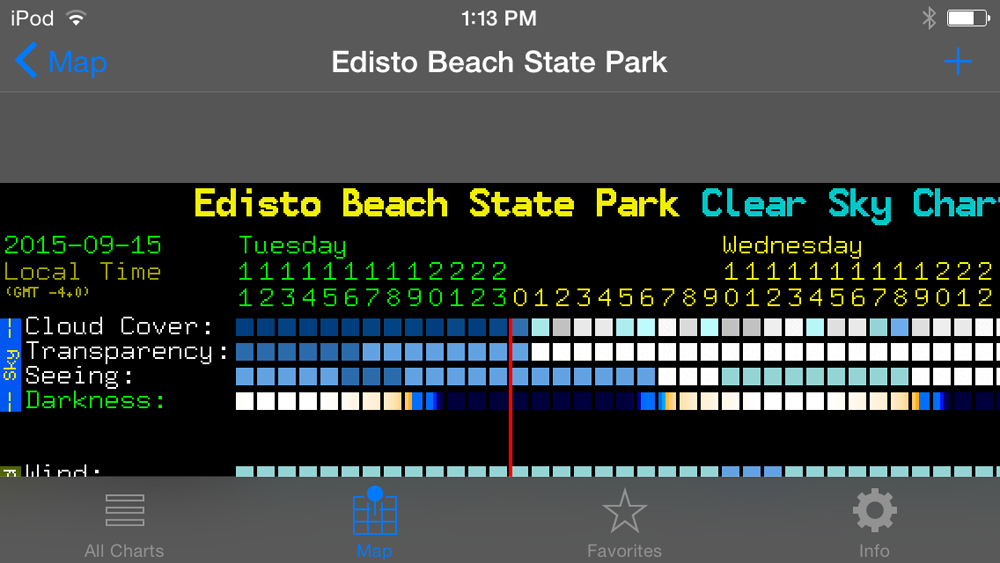
Finally, I do one last check of predicted conditions to make sure I’m as prepared as I can be. I check the weather forecast for the location I’m photographing (rather than where I am) especially if I’m planning on photographing from a higher location than where my hotel is. I only had to photograph sunrise once from Clingman’s Dome in the smokies in a tshirt in 45° temperatures before I learned that lesson. It was at least 20 degrees warmer in town so I didn’t bother to toss a jacket in the care. In addition to the weather forecast, I check the cloud cover forecast. I use the iCSC: Clear Sky Chart Viewer to see what the cloud cover is likely to be. Sky charts are designed to help astronomers figure out what they are likely to be able to see through their telescopes. Photographers use them to get an idea of likely cloud cover for various shoots. Here’s what the cloud cover was predicted to be earlier this week at Edisto Beach.
With a little planning, it’s much easier to be in the right place at the right time to photograph sunrise. Then all you need is a little cooperation from Mother Nature and you’ll have wonderful sunrise photographs to share with your friends and family.
by hankinslawrenceimages | Aug 14, 2015 | Photo Tips
I love heading out to photograph in new locations. So far this year I’ve taken photo trips to Savannah, Georgia, Charleston, South Carolina, the Smoky Mountains of Tennessee and the Palouse in Washington State.
One challenge I always face when I’m planning a trip to a location I’ve seen photos of but have never been to is knowing that I’ve only got a few days to photograph there, and want to make the most of my time. Over the years, I’ve developed a system of researching photo locations so I have a good idea of my photo plans before I leave home.
Once I decide where I’m going, the first resource I check is Robert Hitchman’s Photograph America newsletter. Published quarterly, each twelve page issue focuses on one subject – usually a location – providing detailed information about what there is to photograph, where it’s located, and what time of day is best for certain spots. You can also purchase all the back issues (which are gradually being updated). For $ 40/year I get information written by a photographer for a photographer about places I’ll be visiting. And since my subscription is for the PDF versions – I keep all the ones for an area I’m travelling to on my iPad so I have them with me wherever I am. One of the spots Hitchman discussed in his newsletter on the Palouse was Steptoe Butte State Park, which is where I took this photo.
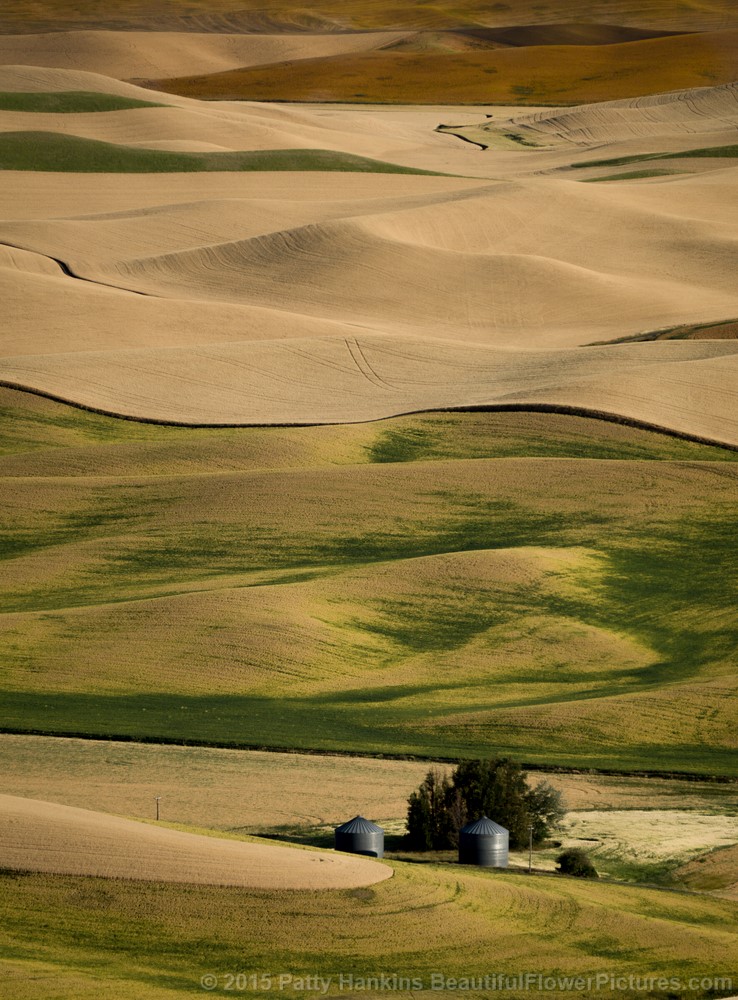
View from Steptoe Butte © 2015 Patty Hankins
Usually the second thing I do when planning a photo trip is head to Facebook and ask my friends what locations they would recommend. I’ve got over 1800 friends on Facebook – which means chances are wherever I’m planning on traveling – one of my friends lives nearby or has lived in the area in the past. I get all sorts of great suggestions for well-known photo locations, the lesser known spots, great little restaurants and coffee shops and wonderful gardens to visit from both my photographer and non-photographer friends. When I asked for info for my spring trip to Savannah and Charleston at least 30 of my friends had suggestions for me of places I never would have found without their help. The other great part of letting my friends know when I’ll be travelling to their areas is I usually end up meeting one or two for a meal or photo shoot while I’m on the road.
Then it’s time to start Googling. I’ll do a search for “photo guide” and the location I’m visiting. More and more photographers are creating ebooks, maps and guides to their favorite photo locations for other photographers. Most are digital publications and cost under $ 25 – and so far everyone of them has been worth well more than I paid for them. A couple of my favorite guides I found using Google are the the annual Texas Bluebonnet Reports from the Texas Wildflower Report and Teri Lou Dantzler’s Photographer’s Map of the Palouse.

By this point, I usually have a long list of possible places to photograph so it’s back to Google to help with prioritizing locations. I’ll check out the websites for any National Parks or National Wildlife Refuges in the area – plus all the locations suggested by my friends. When I find a website I want to check out further – I just save the page in Evernote so I can return to it when I’m on the road. I’ve got a series of notebooks in Evernote organized by state – so all the information I’ve gathered from them web is in one convenient place.
Finally, I set up a board on Pinterest for the location or locations I’m planning on visiting. Then I’ll search for the location and see what I find. I almost always find pins from other photographers who are sharing their photos and I repin them to my board. If I find boards relating to the location or related topics, I’ll start following them and repinning their pins to my new board. By the time I get to where I’m going, I’ve got a board full of beautiful photographs to inspire me as I head out to photograph. 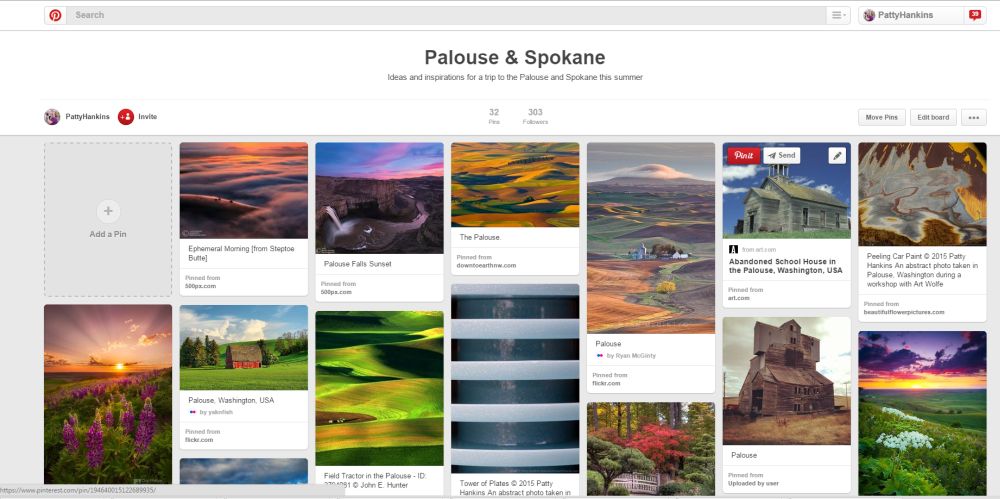
I’ve found that scouting a new location before I go means I have a much more successful photo trip. I usually have a rough itinerary for where I want to be when and a list of backup locations in case something doesn’t work out the way I’d hoped. This is what works for me -have you found other ways to scout photo locations before a trip? If you have, I’d love it if you would share them in the comments section below.

by hankinslawrenceimages | Jun 27, 2015 | Photo Tips
When I’m out photographing at local gardens, people often stop to see what I”m doing and start a conversation. At least a few times a week, people mention they’re looking for a new camera and ask me what I’d recommend.
As much as I’d love to have a simple answer to that question – there really isn’t one camera I’d recommend for everyone.
Personally, I have lots of cameras (OK lots and lots and lots) and what I’m photographing often determines which camera I use.
If I just want to take a quick snapshot to share on social media – I’ll use the camera on my phone.

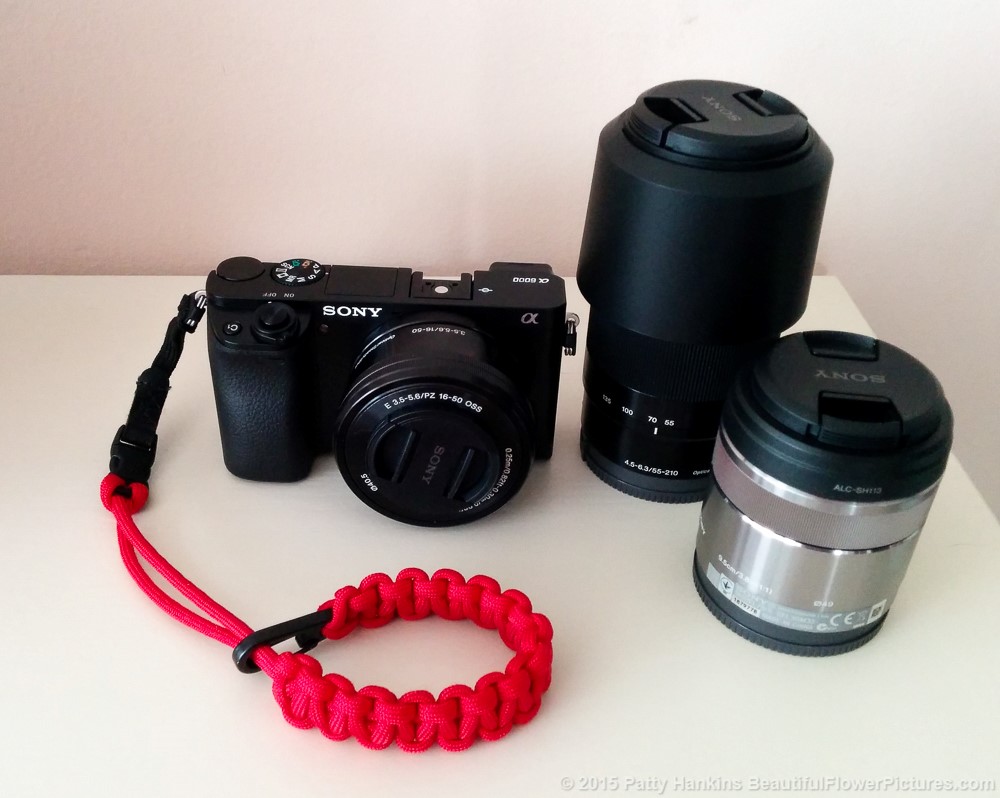
If I’m going to walking around taking photos like I did in New York, or travelling somewhere I won’t have my tripod with me – chances are I’ll be using my newest camera (just got it last week) a Sony a6000 mirrorless system.
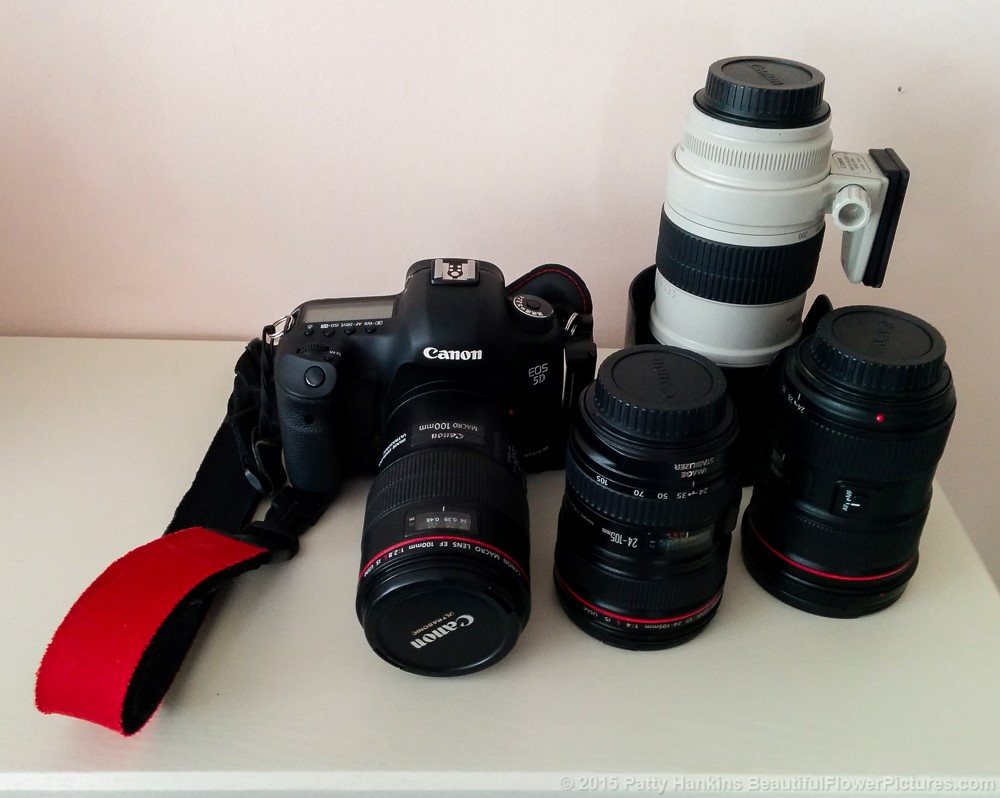
If I’m going to using my tripod, photographing an event, or working in the studio, my Canon DSLR is my go-to gear.
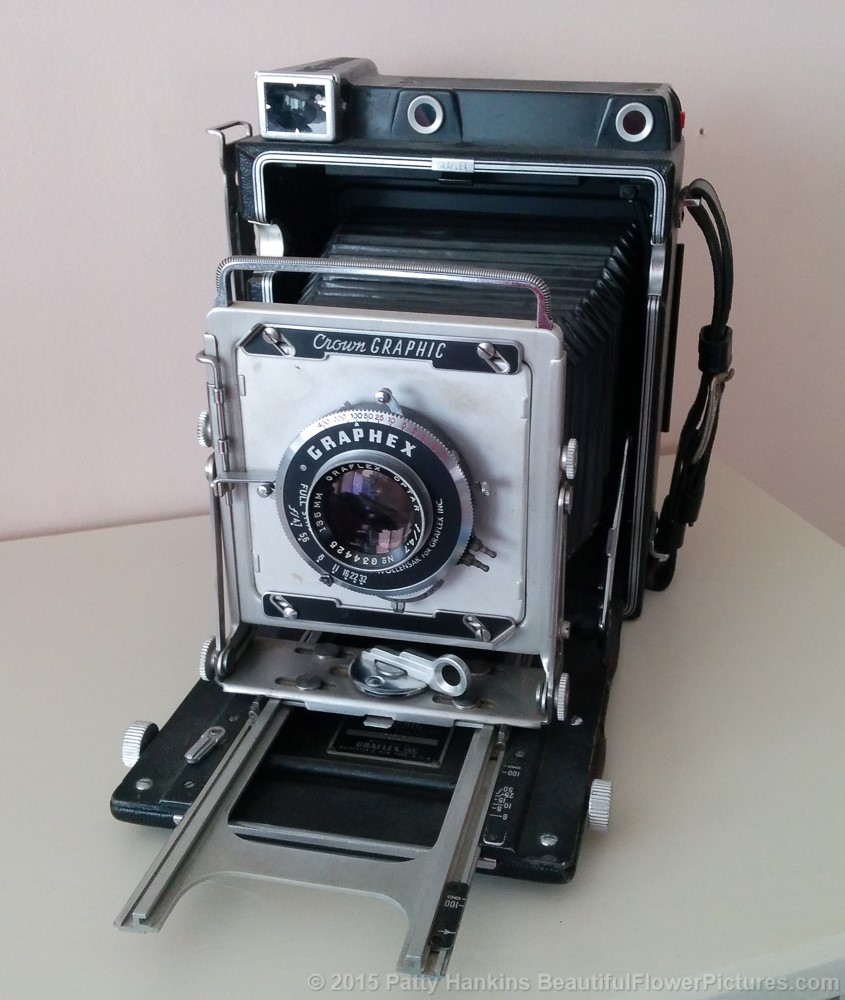
And if I want to shoot instant film – it’s time to pull out my Crown Graphic.
So that’s what works for me – but chances are if you’re looking for a new camera, you’re looking for one camera – not a whole set of cameras.
Let’s make this easy – the perfect camera to use is the one you have with you when you see something you want to photograph.
And here are few points to consider in figuring out what is your perfect camera
- What are you willing to carry? A DSLR camera with lots of lenses doesn’t do you any good if it’s always sitting at home because you don’t like carrying all the gear with you. If what you’re willing to carry when you want to go out photographing is your phone – then your camera on your phone just may be the perfect camera for you.
- Do you need to be able to print your photos larger than 11X14? One drawback to camera phones is that while the photos from them look great on the screen or as a small print, it can be challenging to make large prints from many files taken with a phone.
- Do you want a camera with separate lenses? If you don’t need a camera where you use different lenses with it, take a look at some of the small Point and Shoot cameras on the market, They’re small, lightweight, and can have a nice zoom lens on them. I’ve used Canon, Nikon and Panasonic P&S cameras over the years – been happy with all of them, There are other companies that also make great P&S cameras – it’s just a matter of finding one that meets your needs and fits your budget.
- Do you already have multiple lenses from either another DSLR or film camera? If you do, check to see if any cameras currently on the market work with those lenses, especially if you really love your lenses. Even if you end up replacing some of your lenses down the line, at least you’ll have some lenses to use immediately without having to invest in both new camera and lenses at the same time
- And finally, if you want a camera with inter-changable lenses and don’t already have some lenses, have you considered going mirrorless? Be sure to take a look at some of the mirrorless systems from companies like Sony, Fuji, Panasonic and Olympus. Mirrorless cameras tend to be much smaller and lighter than traditional SLRs, and available with the same features as many DSLRs. I’ve got to admit – one of the great things about my new Sony setup is that my camera bag filled with the body and 3 lenses weighs about 5 pounds – a whole lighter than the 22 pounds of Canon gear I often carry in my pack.
I hope these questions give you a place to start in finding your perfect camera and that you have as much fun photographing with it this summer as I’m having.
by hankinslawrenceimages | Jun 5, 2015 | Apocynaceae Family, Flowers, Photo Tips
I recently got an email from a novice photographer commenting on how they liked that in some of my photos just one flower is in focus – and in others – everything is in focus. And they wanted to know how I got my photos to look like that. Did they need Photoshop or was there another photo editing software package that they could use?
I replied that I set my camera in Aperture Priority, and chose my F-stop based on how I wanted my photo to look – and what part of the photo I wanted to be in sharp focus.
The response I got did surprise me – they replied that it sounded challenging to do it in the field – wouldn’t it really be easier to do it in software?
At least for me, the answer to that question is NO. I would much rather think about what I want my final photo to look like when I’m in the field and do my best to capture it on my camera than to try to fix it in Photoshop later.
When I’m photographing flowers, I tend to set my camera in Aperture Priority Mode. This allows me to choose my F-Stop which lets me control the depth of field – or how much of the photo is in sharp focus.
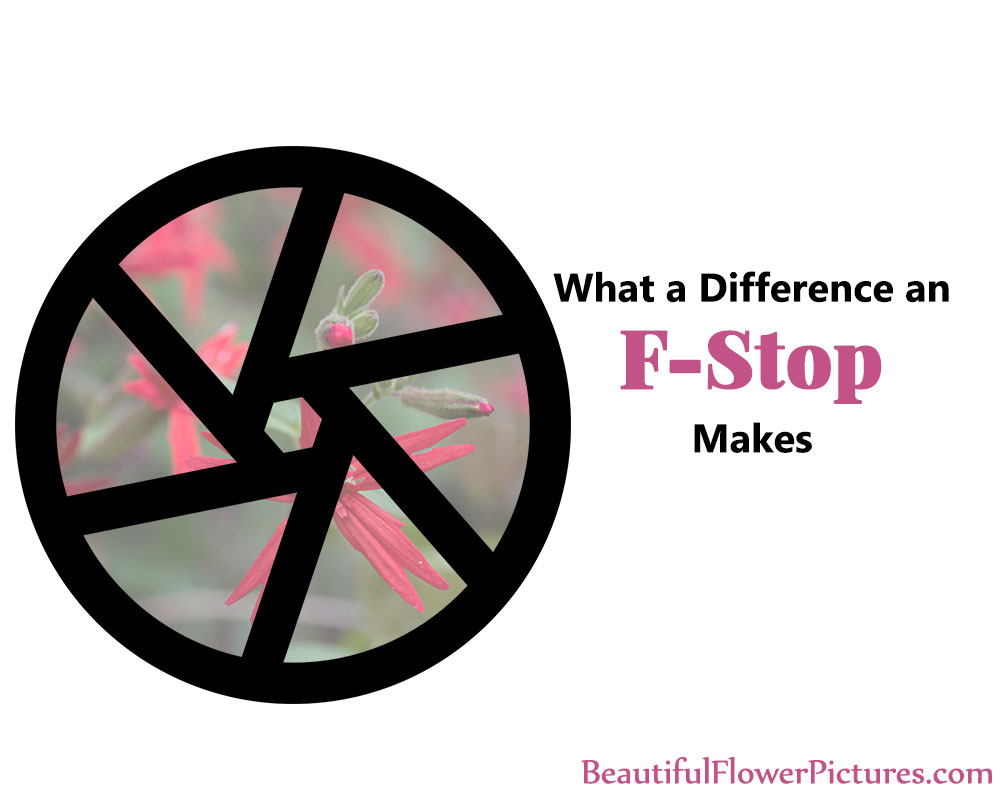
The lower the number of the F-Stop (such as f 2.8) the wider open the aperture in the lens is – and the smaller the area in sharp focus is. Similarly – the larger the number of the F-Stop (such as F 32), the aperture opening in the lens will be smaller and the area in sharp focus will be much larger.
As just words – that really doesn’t make much sense. It’s one of these things that is much easier to show you than to explain it.
Where the F-Stop numbers came from was back in the day of manual lenses – there were blades that opened and closed to control the amount of light. The aperture or opening was wide open at F 2.8 and closed down at F 32. These photos of one of Bill’s lenses for his large format camera shows the lens blades wide open and closed down.
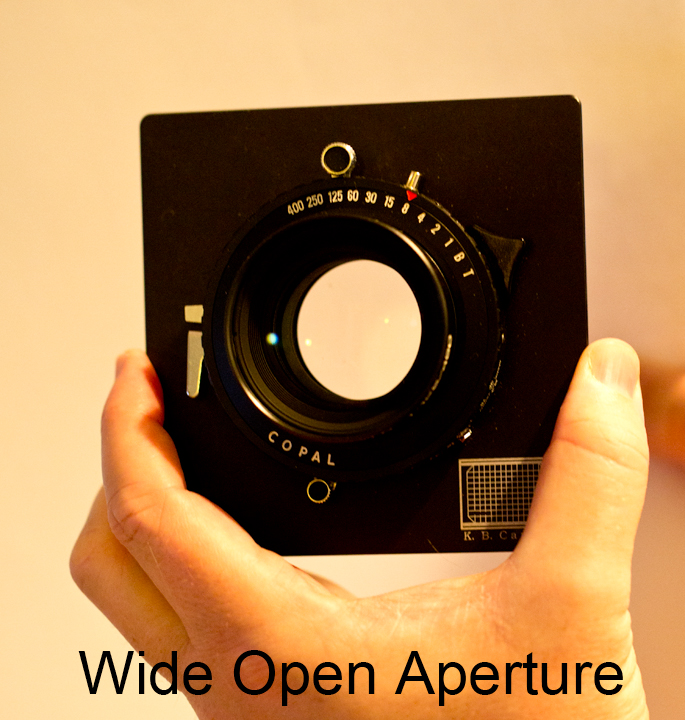
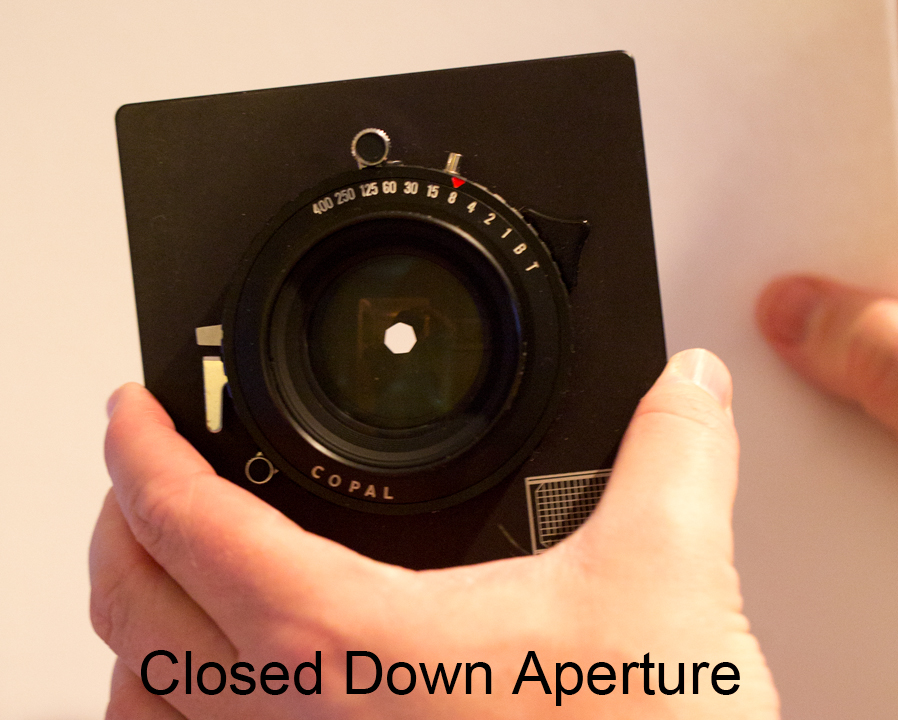
And to show how changing the F-Stop affects the look of your photo – I took a series of 8 photos of butterfly weed at F-Stops ranging from F 2.8 to F 32.
The first photo was taken at F 2.8 – a wide open aperture with a shallow depth of field. As you can see – just a few of the blossoms are in sharp focus and the rest of the photo is blurred.
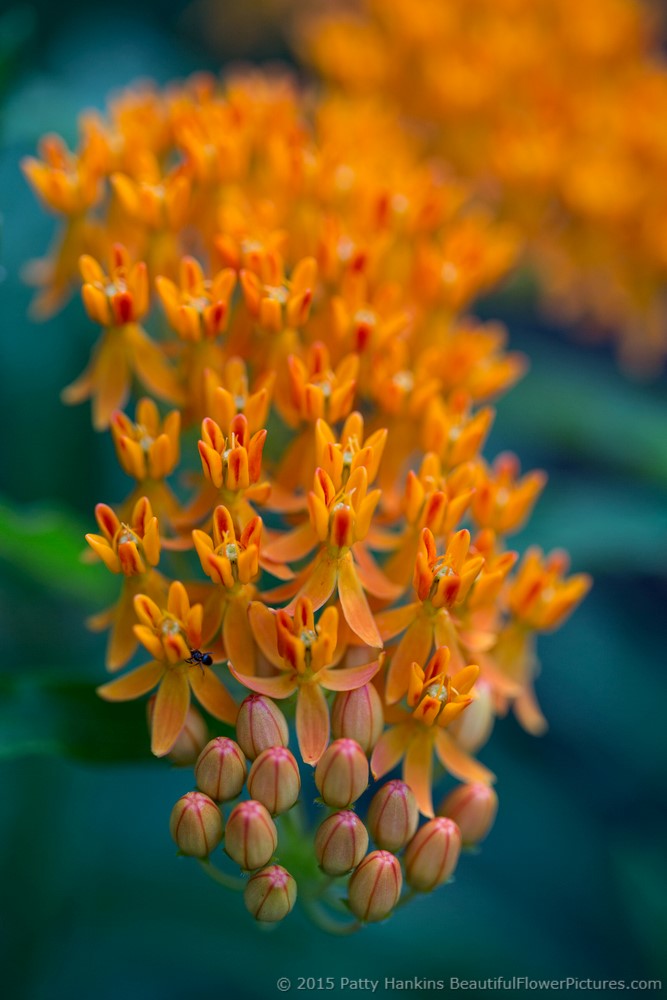
F 2.8
As you look through the next several photos – notice how many of the blossoms are in sharp focus and how much of the background you can clearly see.
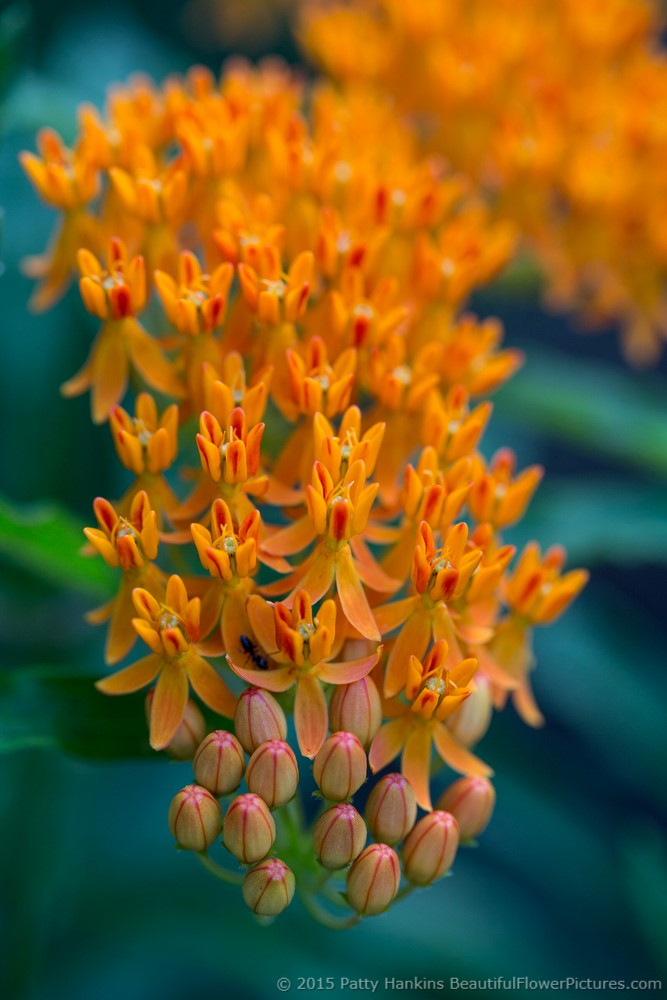
F 4
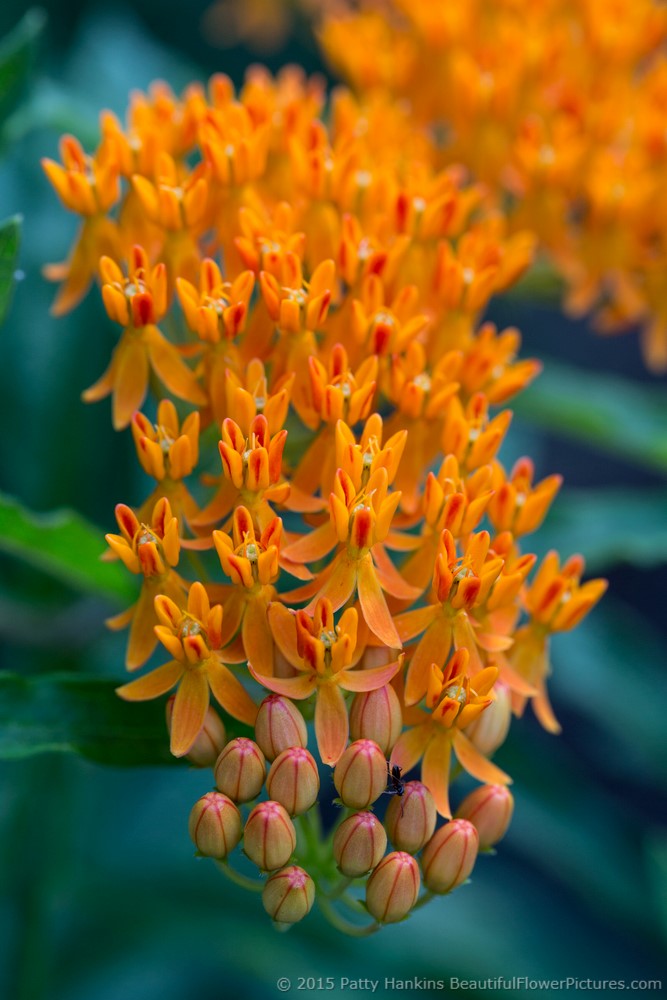
F 5.6
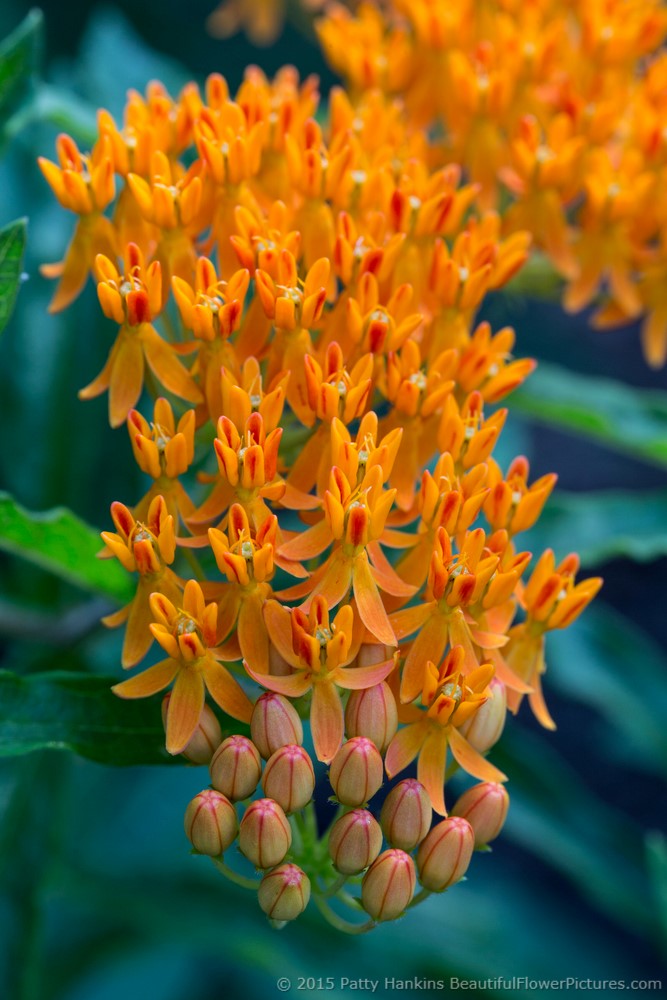
F 8
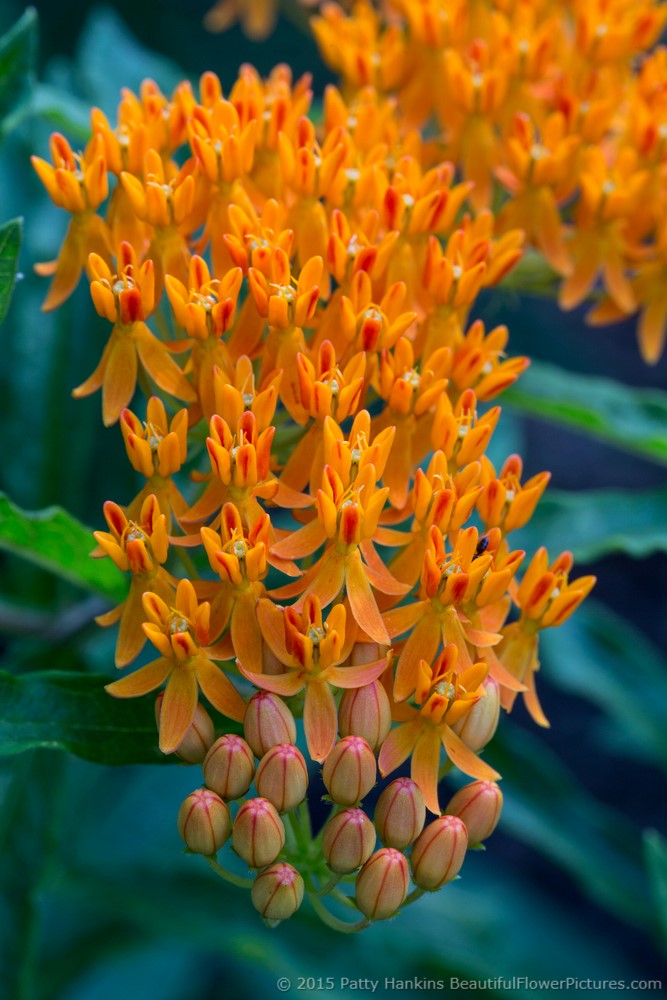
F 11
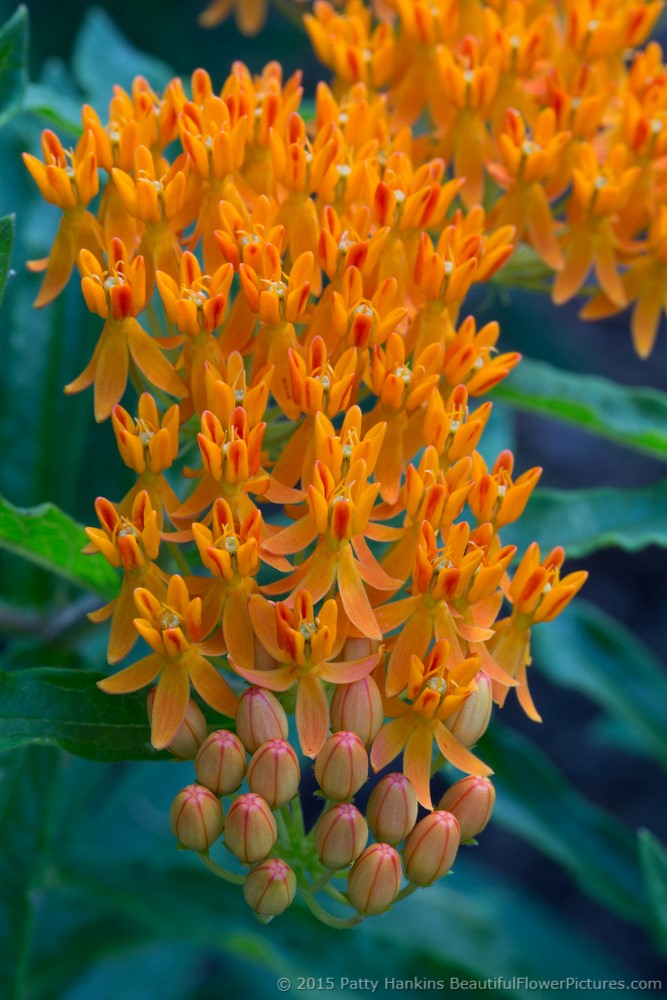
F 16
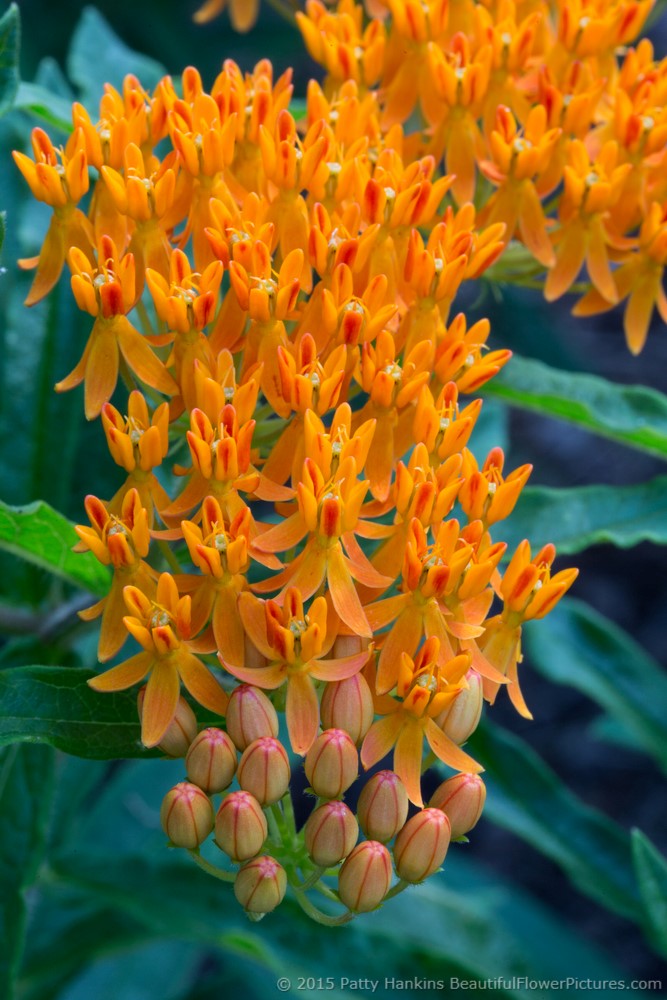
F 22
The last photo was taken at F 32 – a very narrow aperture with a large depth of field. Just about the entire photo is in sharp focus – everything from all the blossoms to the leaves in the background are clearly defined.
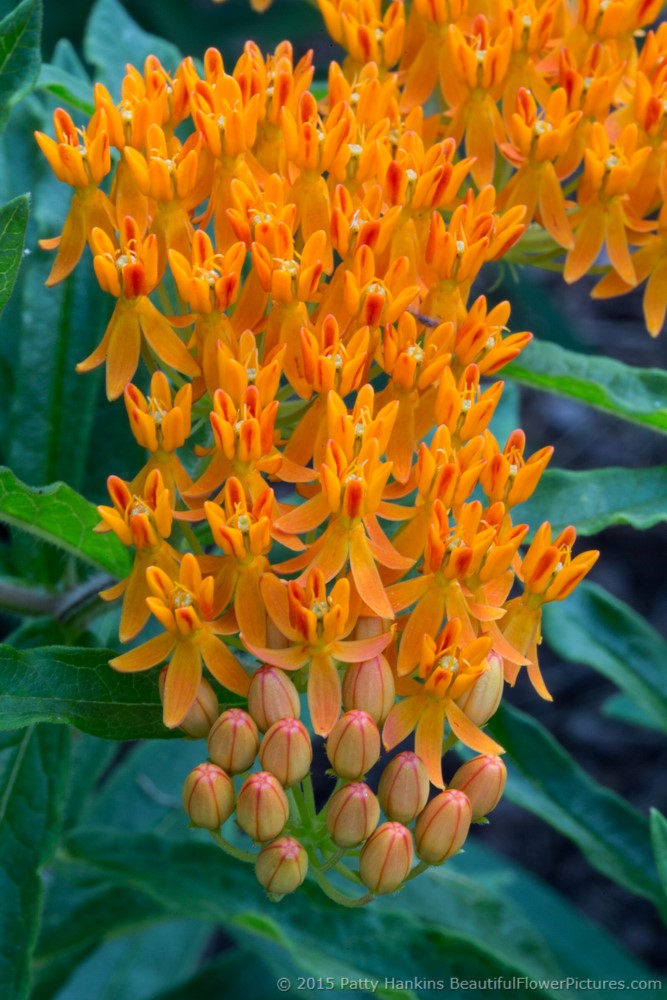
F 32
And what’s great is that you get to decide how much of your photo will be in sharp focus and what your final photo will look like – simply by choosing the F-Stop that lets you create the photo you want to share with the world.
I’d appreciate it if you’d let me know if you found this article helpful and if you’d like me to include more articles like this in future newsletters. I’d love to help you create photos you are proud to share with the camera gear you already have.

by hankinslawrenceimages | Apr 3, 2015 | Photo Tips, photography
I don’t know about you but I’ve noticed that I have my go-to camera gear and settings that I use most of the time when I’m photographing flowers and landscapes. Chances are I have my Canon 5DMarkIII body and four lenses – 16-35 mm, 24-105mm, 70-200 mm and my 100mm macro lens (my favorite) with me. I’ll be carrying my tripod – and will use it as much as possible. If you look at my camera it’s likely set in Aperture Priority, ISO 100, and my lenses are all set on manual focus, image stabilization off.
This is a setup that works for me – but in some ways it also limits how I photograph. Having to set up the tripod, pull my gear out of my pack and manually focus my camera means I don’t take many spontaneous photographs. I tend to think about what I want to show in my photo, and compose based on my idea for my photo.
Several times during my trip to Georgia and South Carolina I photographed in a completely different style. I did what Brooks Jensen of Lenswork magazine refers to as Photography By Walking Around (PBWA) – where I just walked around a city or town photographing whatever caught my eye.
I put my camera and one lens (24-105mm) in a small bag, left my tripod in the car and headed out exploring. At first I was really uncomfortable photographing like this – it just didn’t feel right not using my tripod and using autofocus. But then I realized I was still creating photos that would convey what I wanted to share – I was just taking them in a different way.
At which point I just relaxed and had fun. Here are a few of the photos I took walking around Savannah’s historic district.
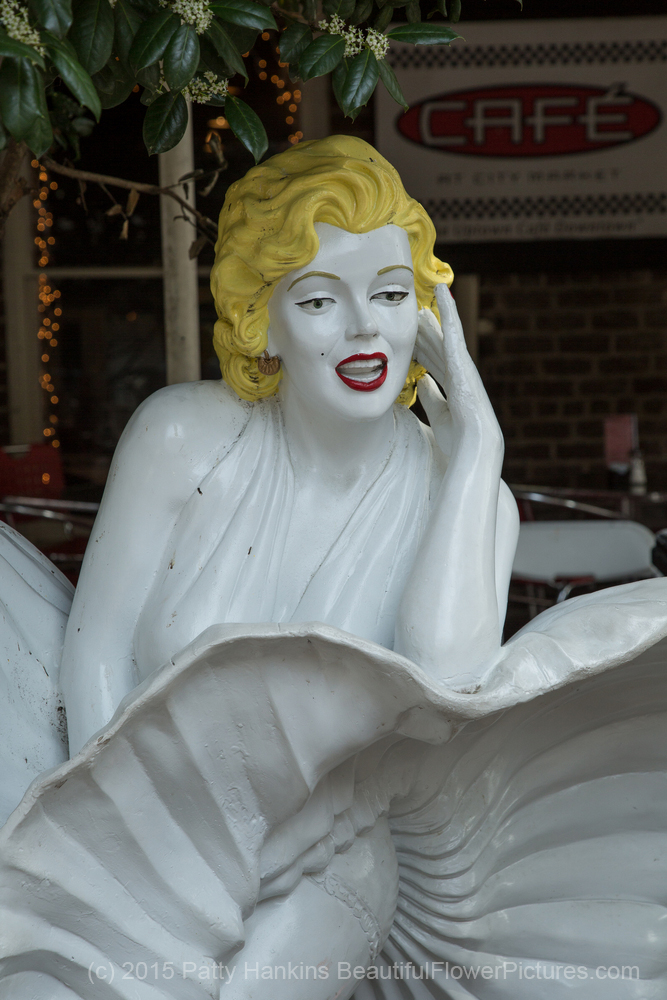
Marilyn Monroe sculpture at City Market, Savannah GA © 2015 Patty Hankins
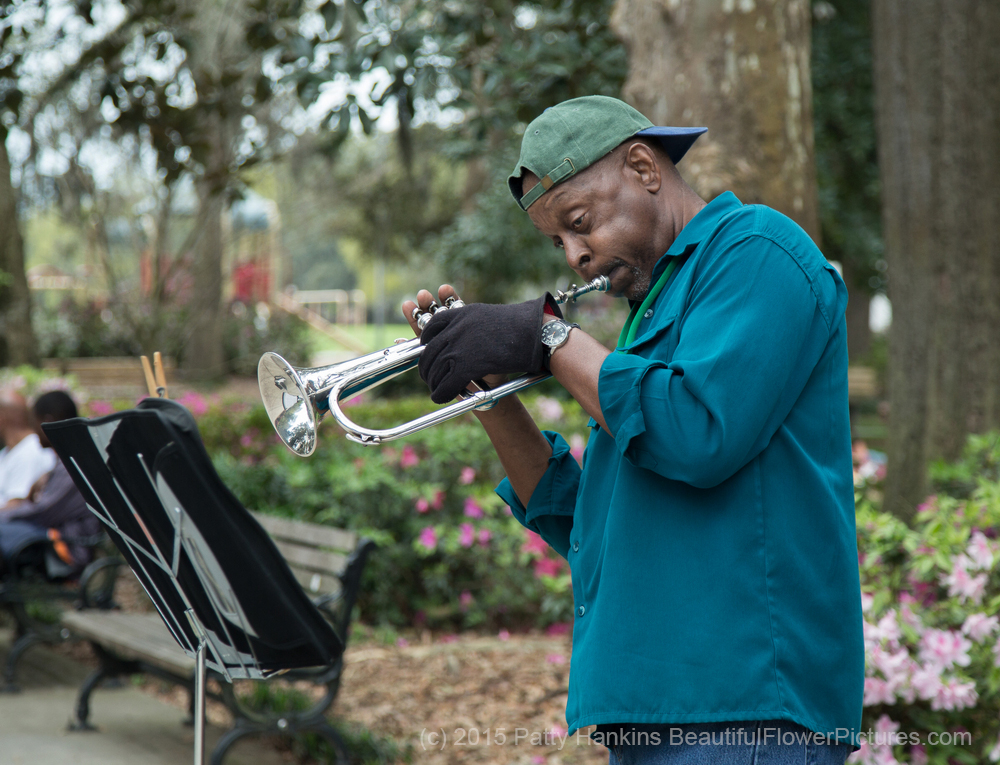
Trumpet player at Forsyth Park, Savannah, Georgia © 2015 Patty Hankins
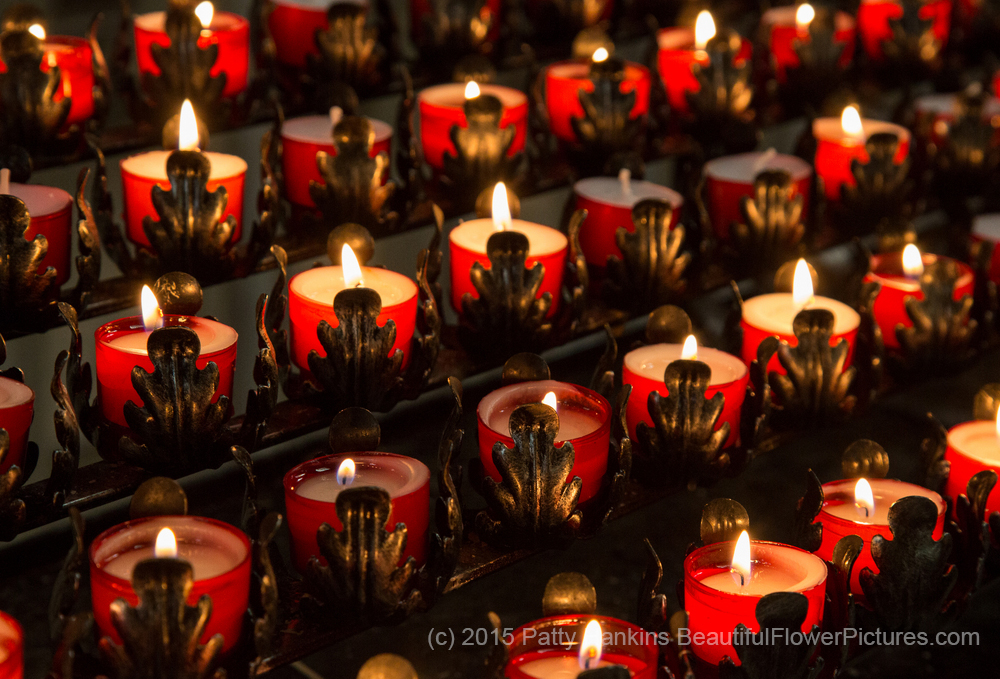
Candles at the Cathedral of St John the Baptist, Savannah, Georgia © 2015 Patty Hankins
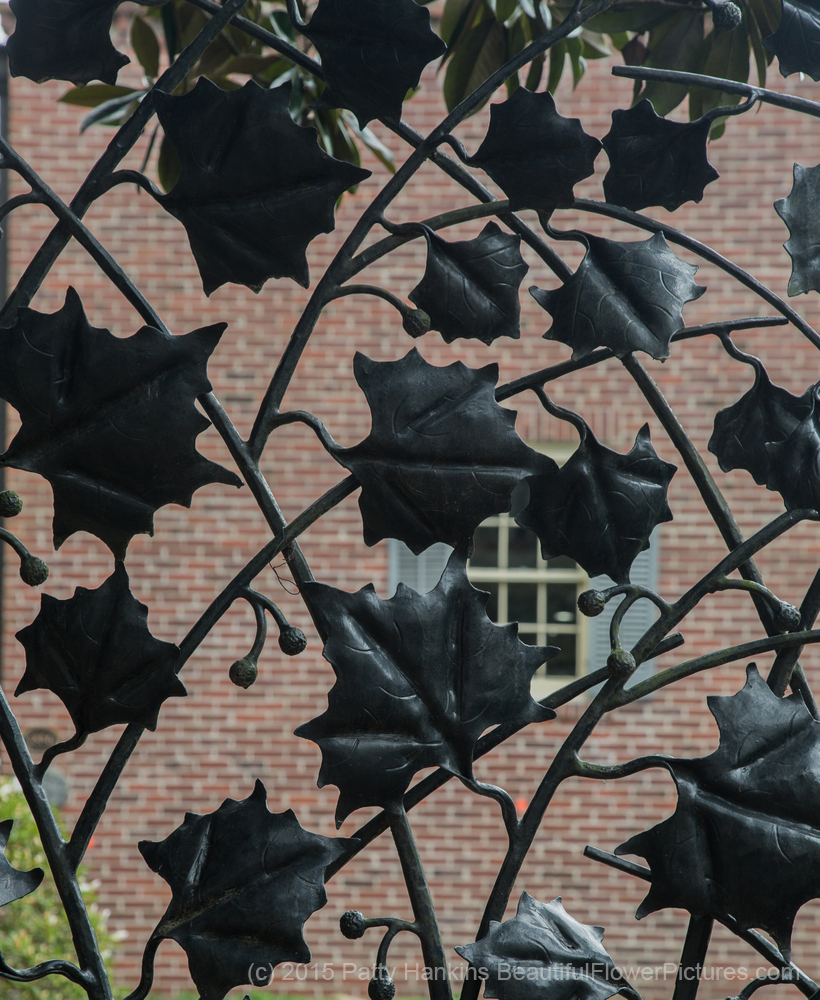
Ironwork Leaves on a Garden Gate , Savannah, Georgia © 2015 Patty Hankins
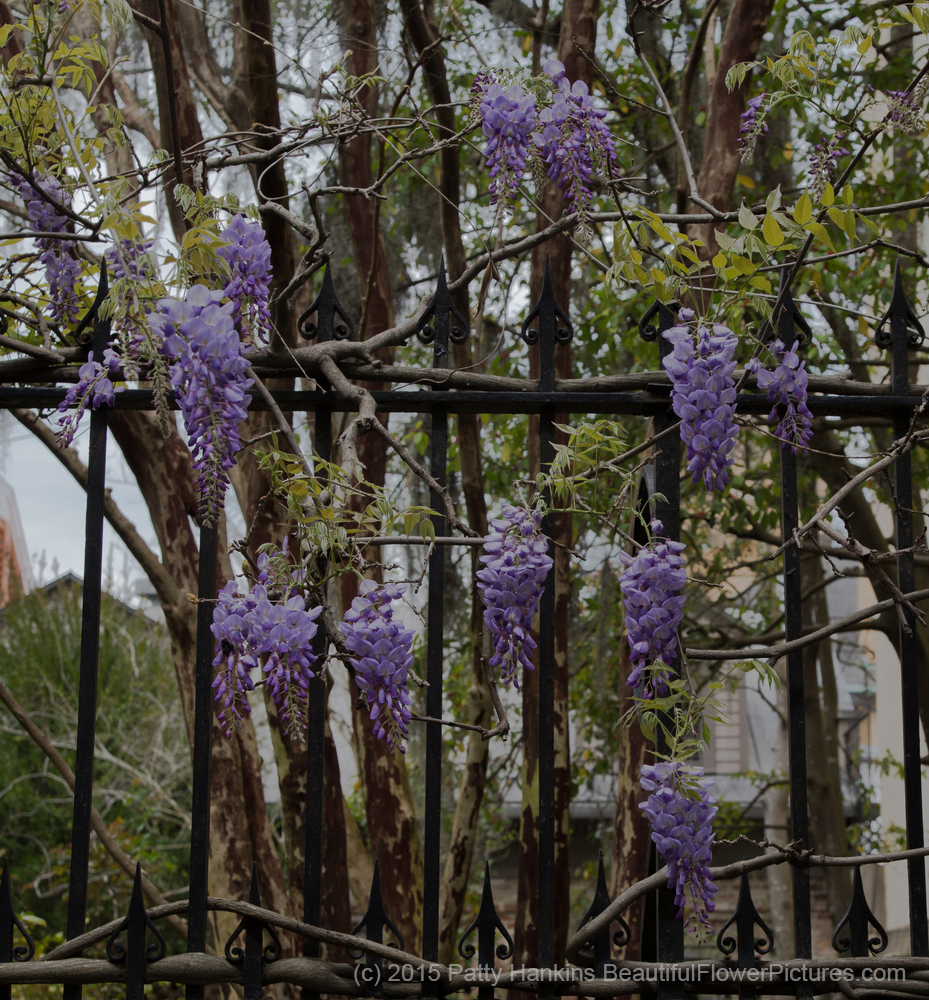
Wisteria Along a Fence, Savannah, Georgia © 2015 Patty Hankins
I did more PBWA in Bluffton, Beaufort and Charleston. Keep an eye out here on my blog for more photos from my photographing by walking around. I’m sure I’ll be posting more in the weeks to come.
And if you tend to have your go-to lenses and settings the way I do – I’d encourage you to get out of your comfort zone of your usual style of photographing and try something new. If you usually use a tripod – try hand holding your camera. If you usually have your camera set in Program mode – try Shutter or Aperture Priority. You might just discover, the way I did, that there are other ways of photographing that are as much fun and as satisfying as your usual way of doing things is.
I’d love to hear what happens when you got out of your comfort zone and tried something a little different. Tell me about it in the comments below.


