Recently I was talking with a friend about why I’ve been doing so much studio photography lately. One of the main reasons is that I can control the light on my subject when I’m in the studio. When I’m photographing at a garden or in a park – I have to work with the light I find – and sometimes it’s just not very conducive for creating the photos I want to create.
In the studio, things are totally different. By using multiple lights, I can control which areas of the flowers are in light and which are in the shadows. I can also control how deep the shadows are.
Rather than spend more time trying to explain it – I thought I’d just show you some examples of how different combinations of light make a difference in my photos.
I usually have one light as my main light for the overall brightness of the scene, and then a second light down a stop or two to create some interesting shadows and sense of depth in my photos.
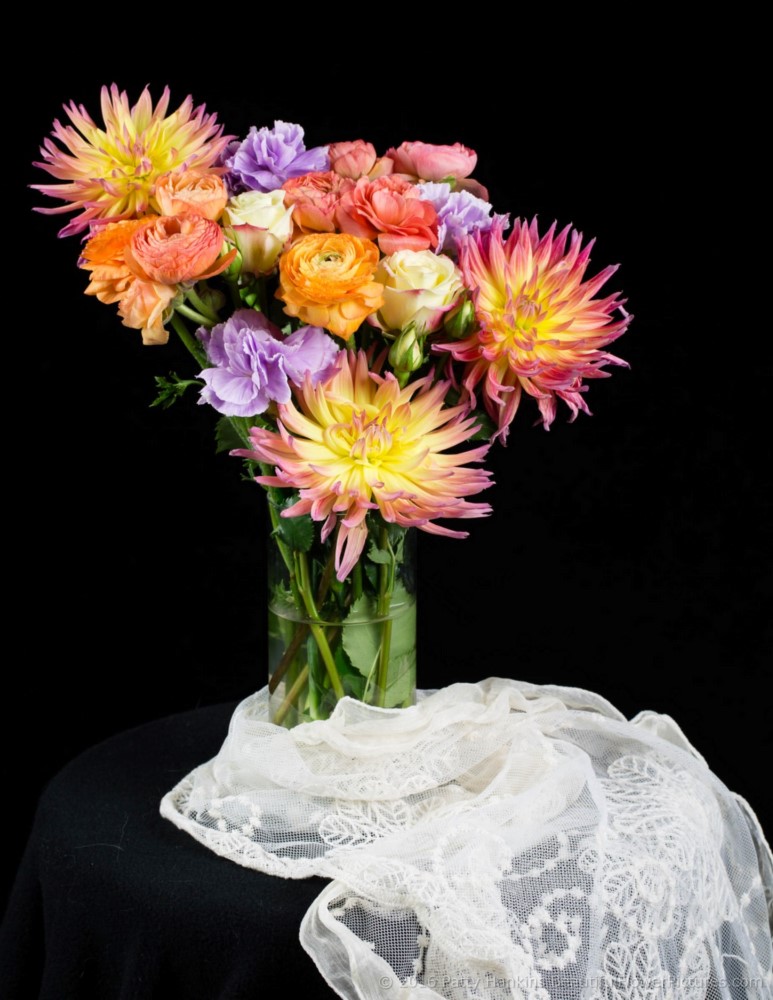
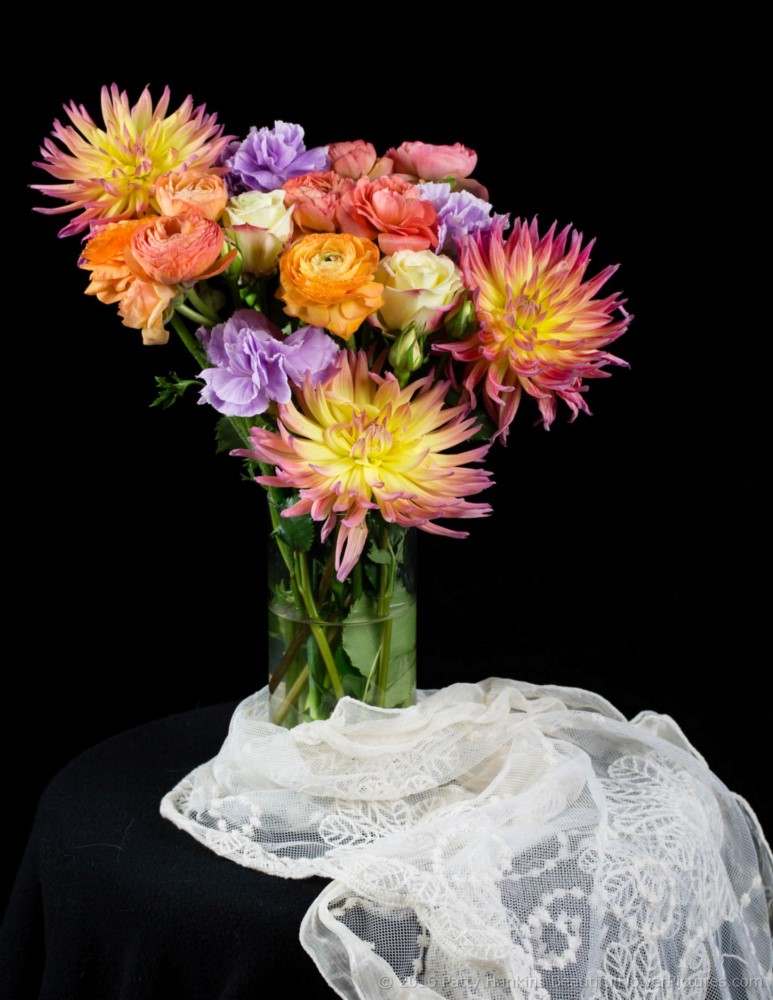
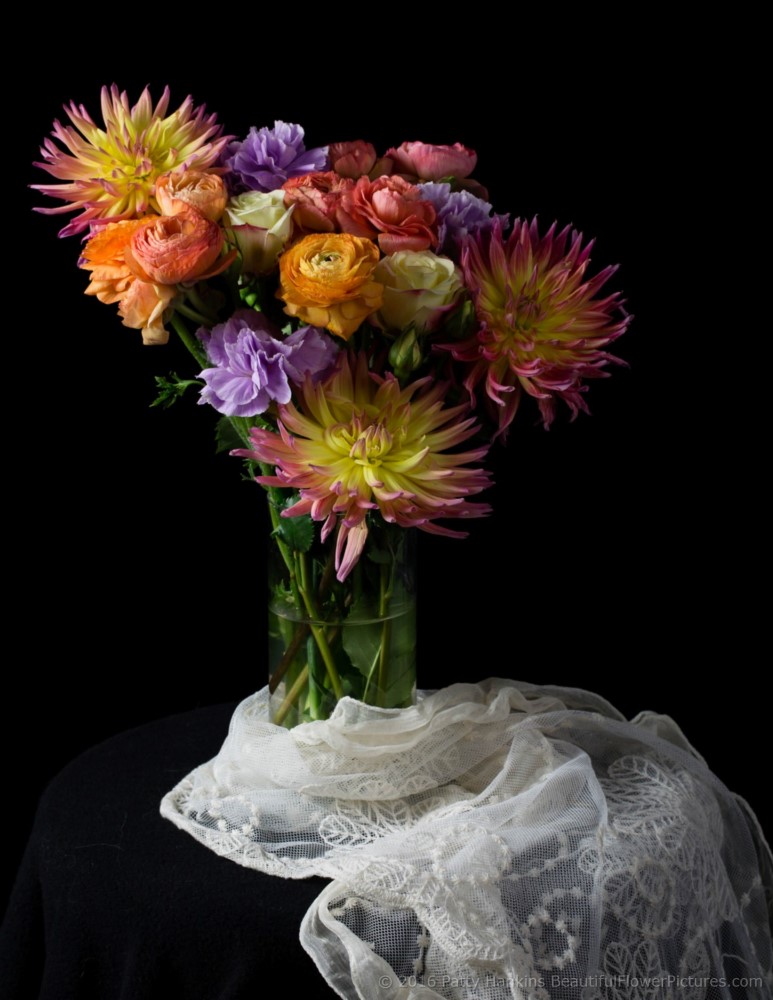
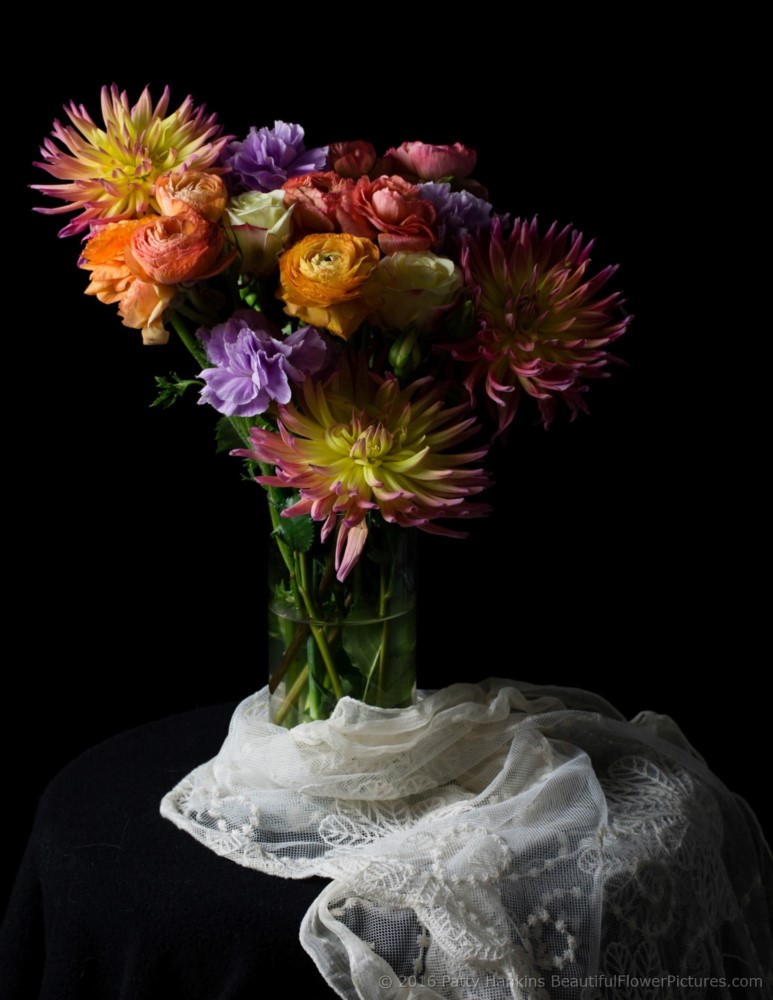
This first set of photos were taken under two lights in my studio – one to the right of the floral arrangement and one to the left. For all four photos, my camera settings were ISO 100, f 11, 1/15 sec. The only change I made to the photos in Lightroom were a bit of cropping and converting them from RAW files to JPGs.
In this first photo, both lights are at full power.
In the second photo, the light to the right is at half power, while the light on the left is still at full power. You can start to see more shadows in this photo compared to the first one.
In the third photo, the light on the right is at minimal power, while the light on the left is still at full power. The difference in the photos becomes more dramatic as the difference in the light levels increases.
And in the fourth photo, the light on the right is off, while the light on the left is still at full power. This gives a very directional feel to the light in the photo, similar to light coming through a window into a darkened room.
As another example, I photographed a pair of papaya calla lilies to show how changing the light levels on different sides can create very different looks. All of these photos were taken at ISO 100, f 16, 1/3 sec. Again the only edits made in the Lightroom were cropping the photos and converting from RAW to JPG.
Both lights at full power
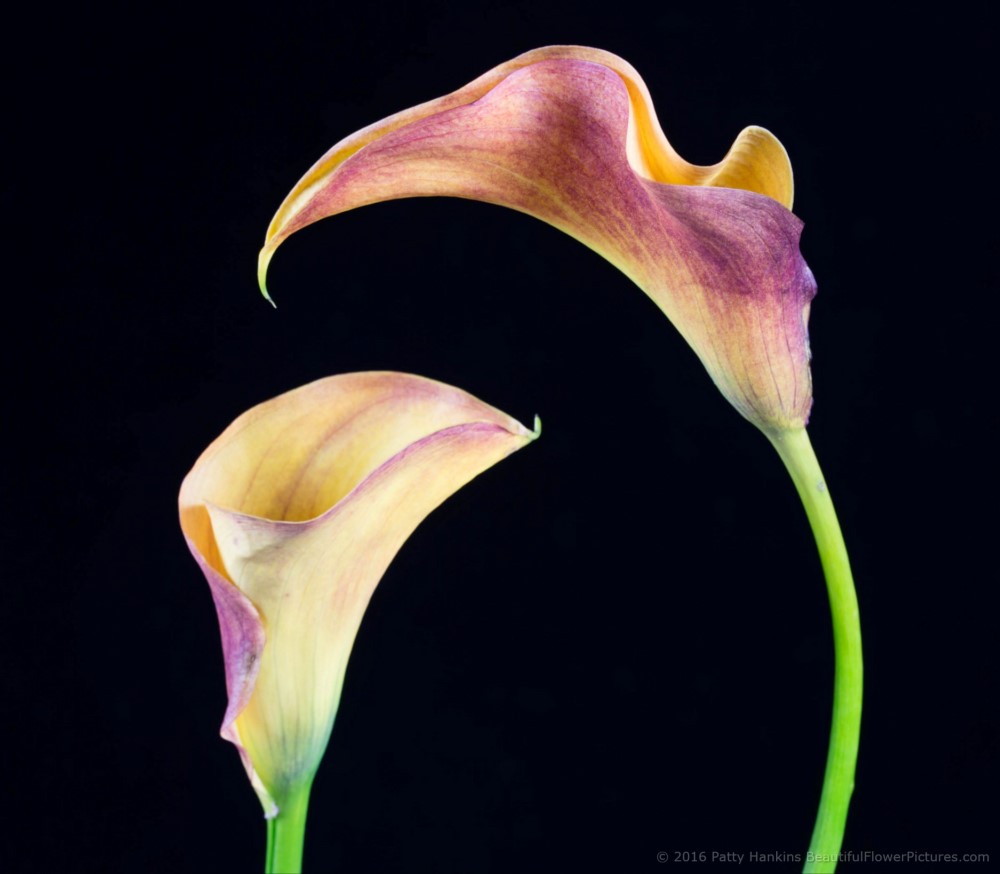
Light to the right at full power, light to the left at half power.
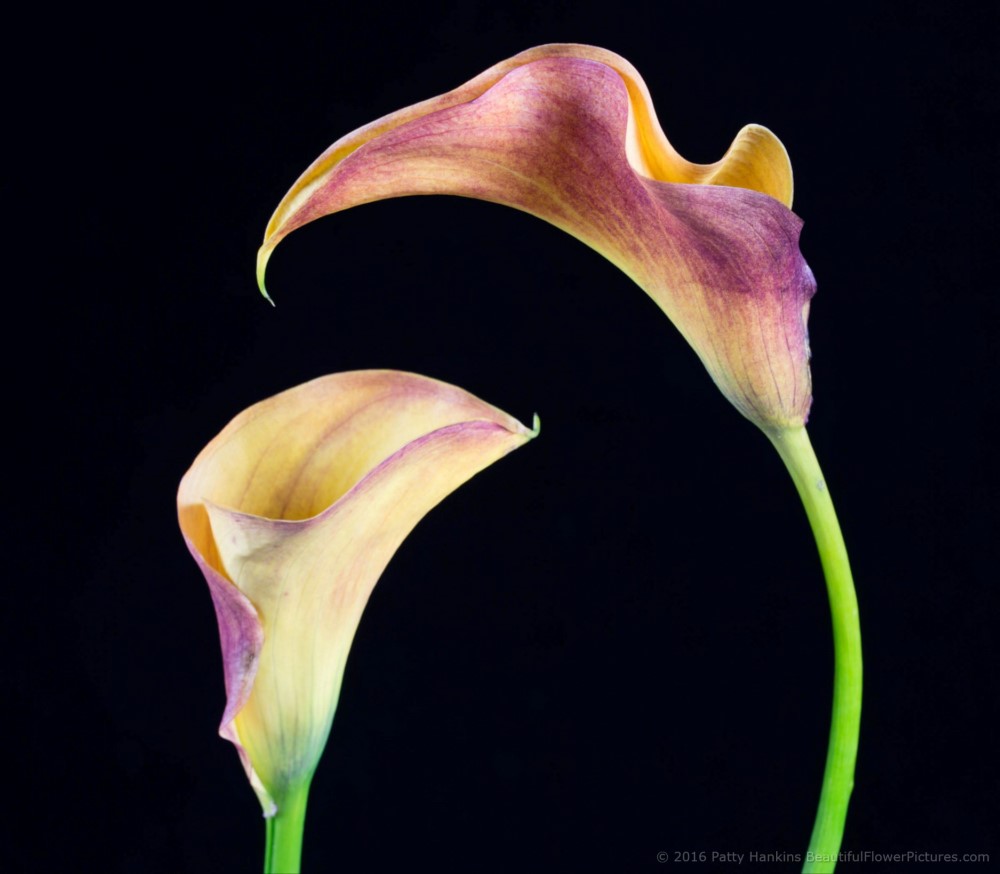
Light to the right at full power, light to the left at low power.
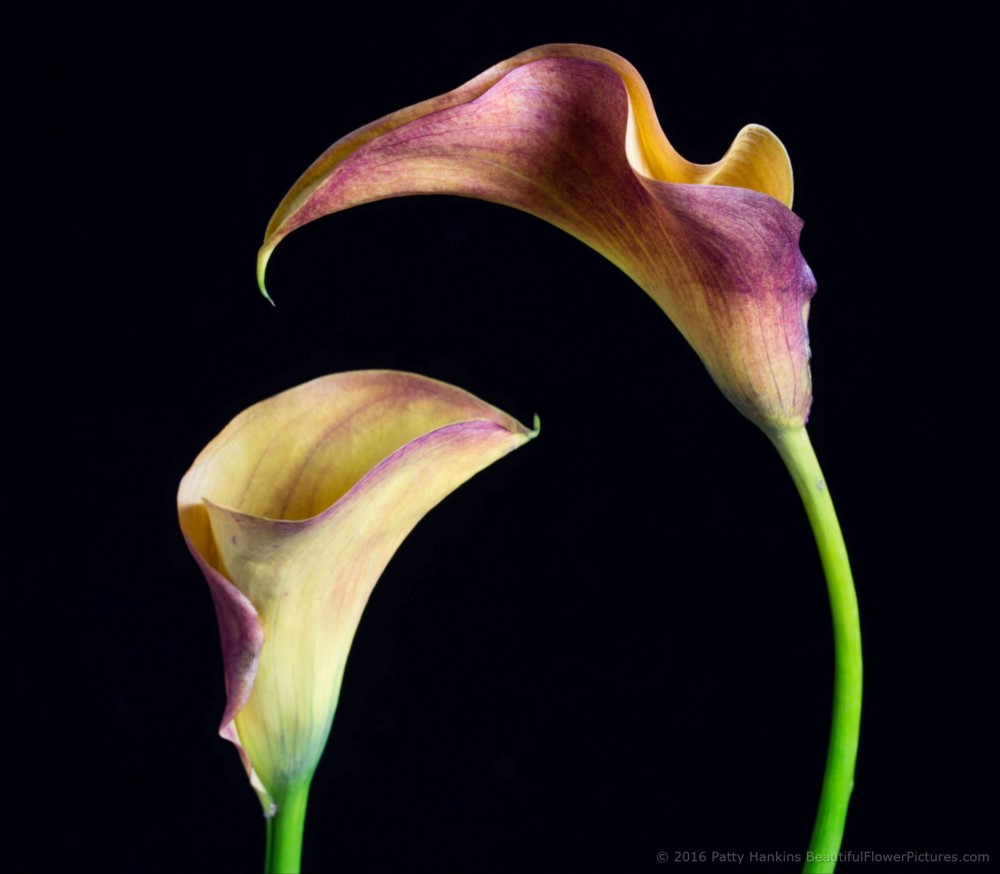
Light to the right at full power, light to the left turned off.
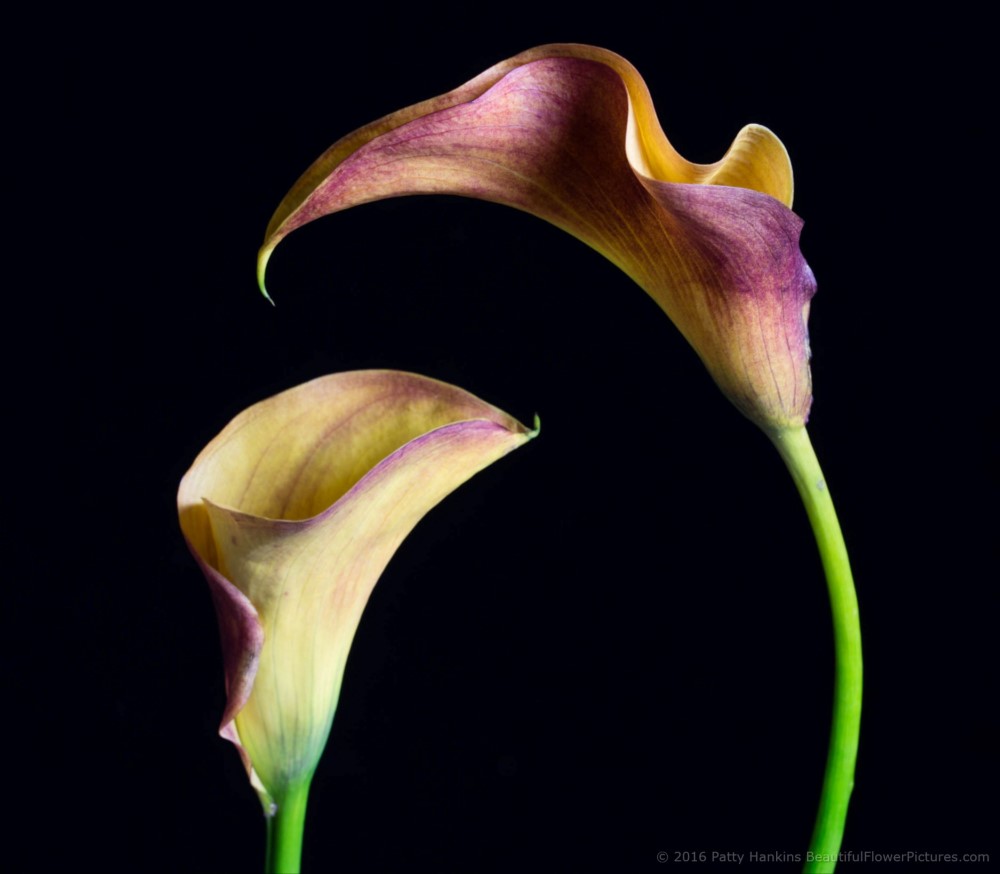
Light to the left at full power, light to the right at half power.
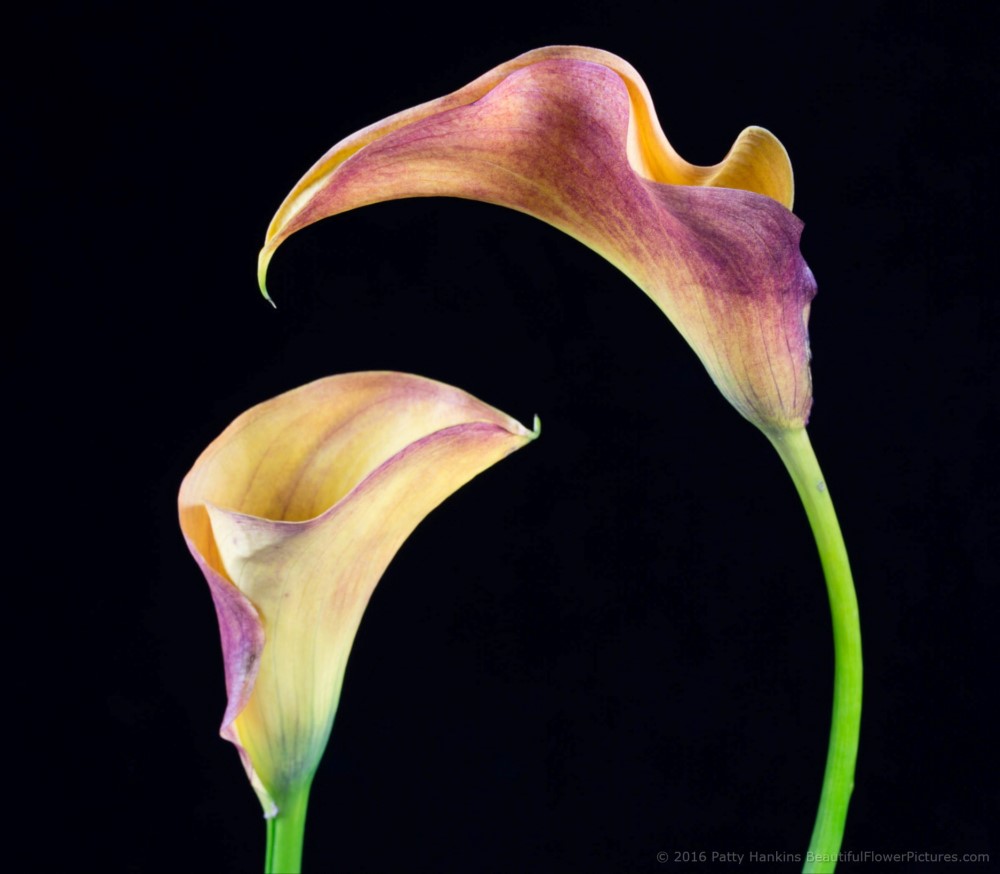
Light to the left at full power, light to the right at low power.
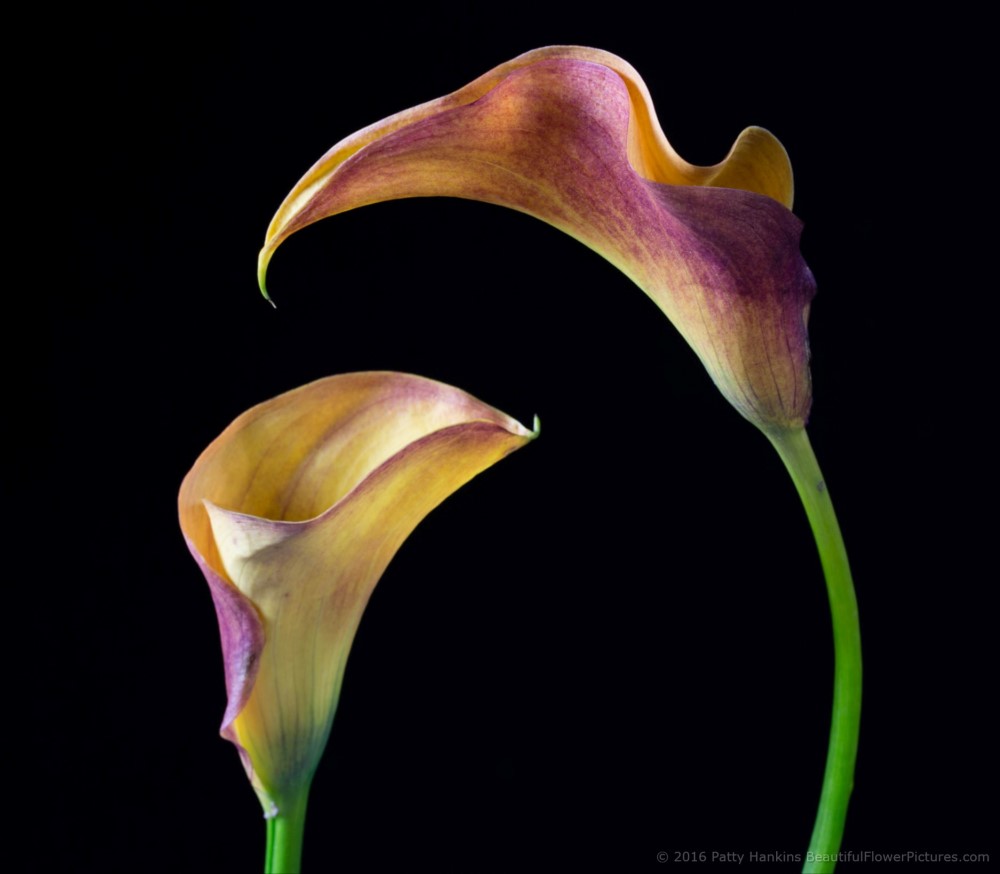
Light to the left at full power, light to the right turned off.
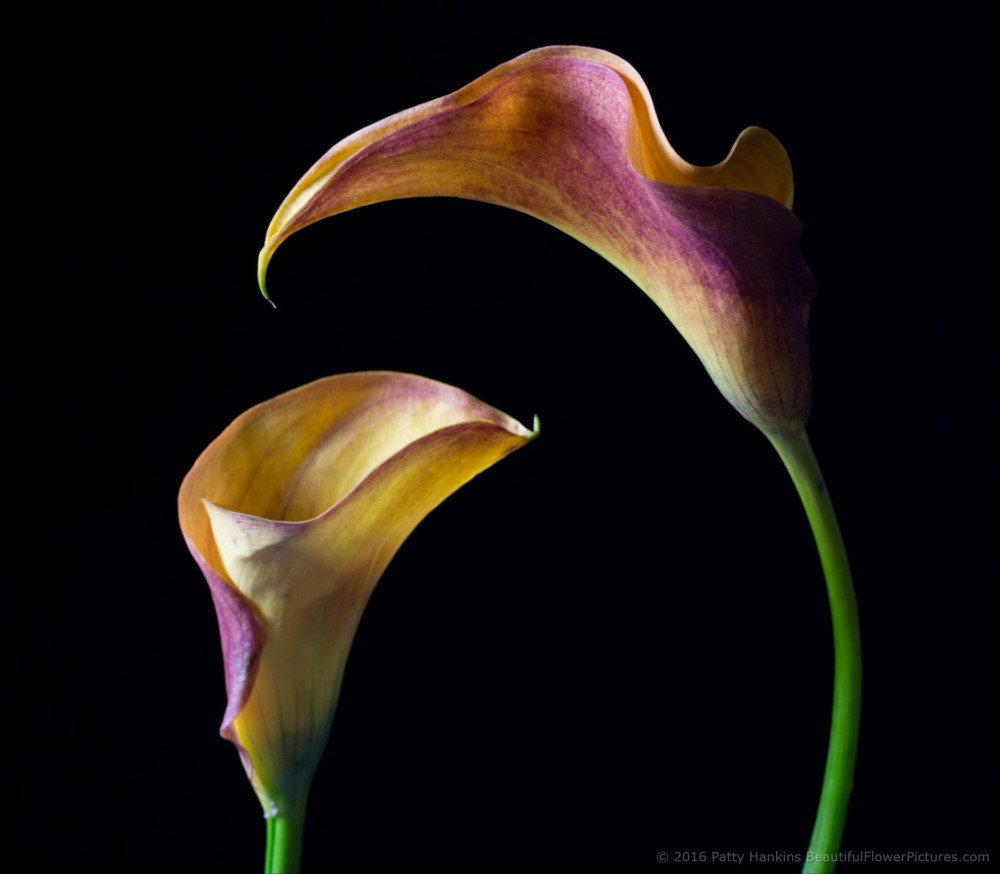
As you can see, choosing different levels of light on your subject can create very different looks in your final photos.
Working with different levels of light to create your photos is one of the things Bill and I work with our students on in our Photographing Flowers in the Studio workshop. We’ll be teaching this workshop on Sunday January 15, 2017 in Bethesda, MD. You can learn more about the workshop, including registration info on my website at http://beautifulflowerpictures.com/photographing-flowers-studio-workshop-jan-2017/
I’d love to have you join me for the workshop. Feel free to email me if you have any questions about the workshop.
